OpenCart
This document presents the steps for integrating the Geidea payment gateway with your OpenCart store.
Overview
OpenCart is an online store management system. It is PHP-based, using a MySQL database and HTML components. It is designed for small to large online merchants to set up e-commerce sites seamlessly and quickly. Geidea Payments Online is a gateway plugin that extends OpenCart, allowing you to accept payments through Geidea. You can easily accept credit card payments and other payments through wallet providers or Buy-Now-Pay-Later (BNPL) providers.
Integrating our payment gateway with OpenCart's online stores has never been easier. Through the Geidea Online Payments plugin in our GitHub repository, our payment gateway can be seamlessly integrated with just a few lines of code.
Pre-requisites
You will need a merchant account with Geidea and the following software running in your hosting environment to accept payments using the Geidea payment gateway.
| Software | Version |
|---|---|
| OpenCart | 4.0.2.0 or greater |
| Geidea Online Payments plugin | 3.3.0 |
| PHP | 8.2.0 or greater |
While we make every effort to test software or module or plugin updates rigorously, there is no guarantee that a plugin or module would work seamlessly with your hosting environment. So please back up your website before updating any plugins or modules. This helps you restore your website from backup in case you run into unexpected errors.
Software and plugin or module updates involve programming code changes. The updates may often request upgrades to the server or other hosting software such as PHP as well.
Integration Steps
Step 1 - Installing the plugin
- Download the Geidea Online Payments for OpenCart from here.
- Log in to your administrator account of your OpenCart store.

- Navigate to the extension installation menu Extensions > Installer.
- Click on the upload icon to upload the plugin. Browse the plugin on your local machine and select the plugin.

NoteThe plugin must be uploaded as a “.zip” file format to be accepted by the plugin installer.
- The plugin is automatically installed.
Step 2 - Configuring the plugin
- Navigate to the extensions menu and select the installed Geidea Online Payments plugin through the following path
Left Sidebar > Extensions > Extensions
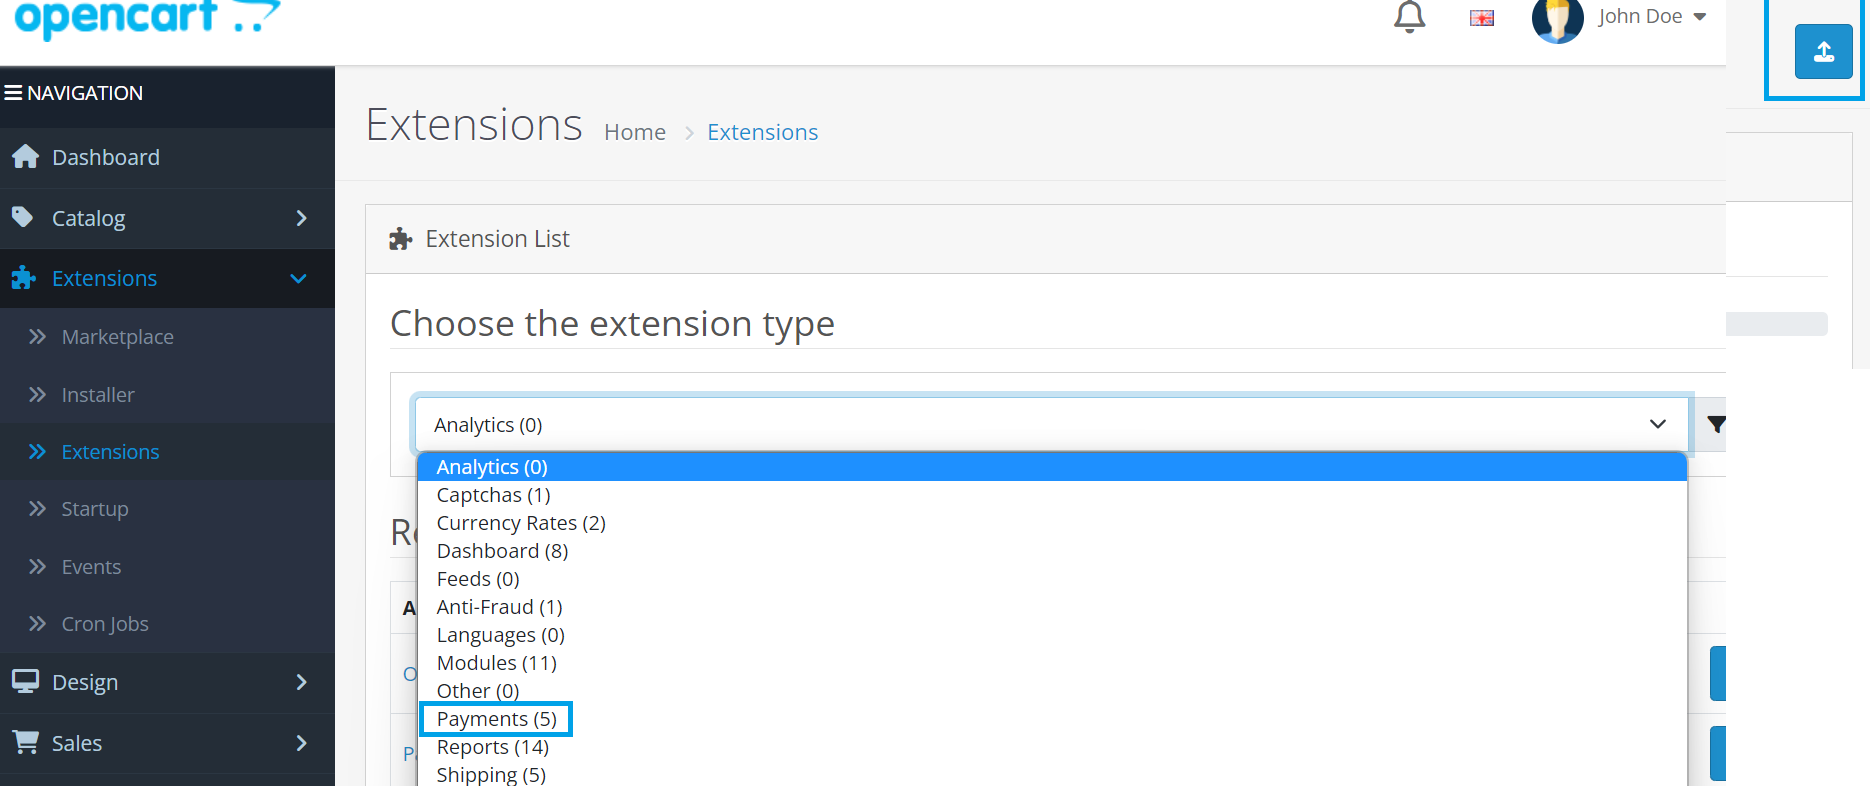
- Select Payment Extensions from the dropdown values of Choose the extension type option
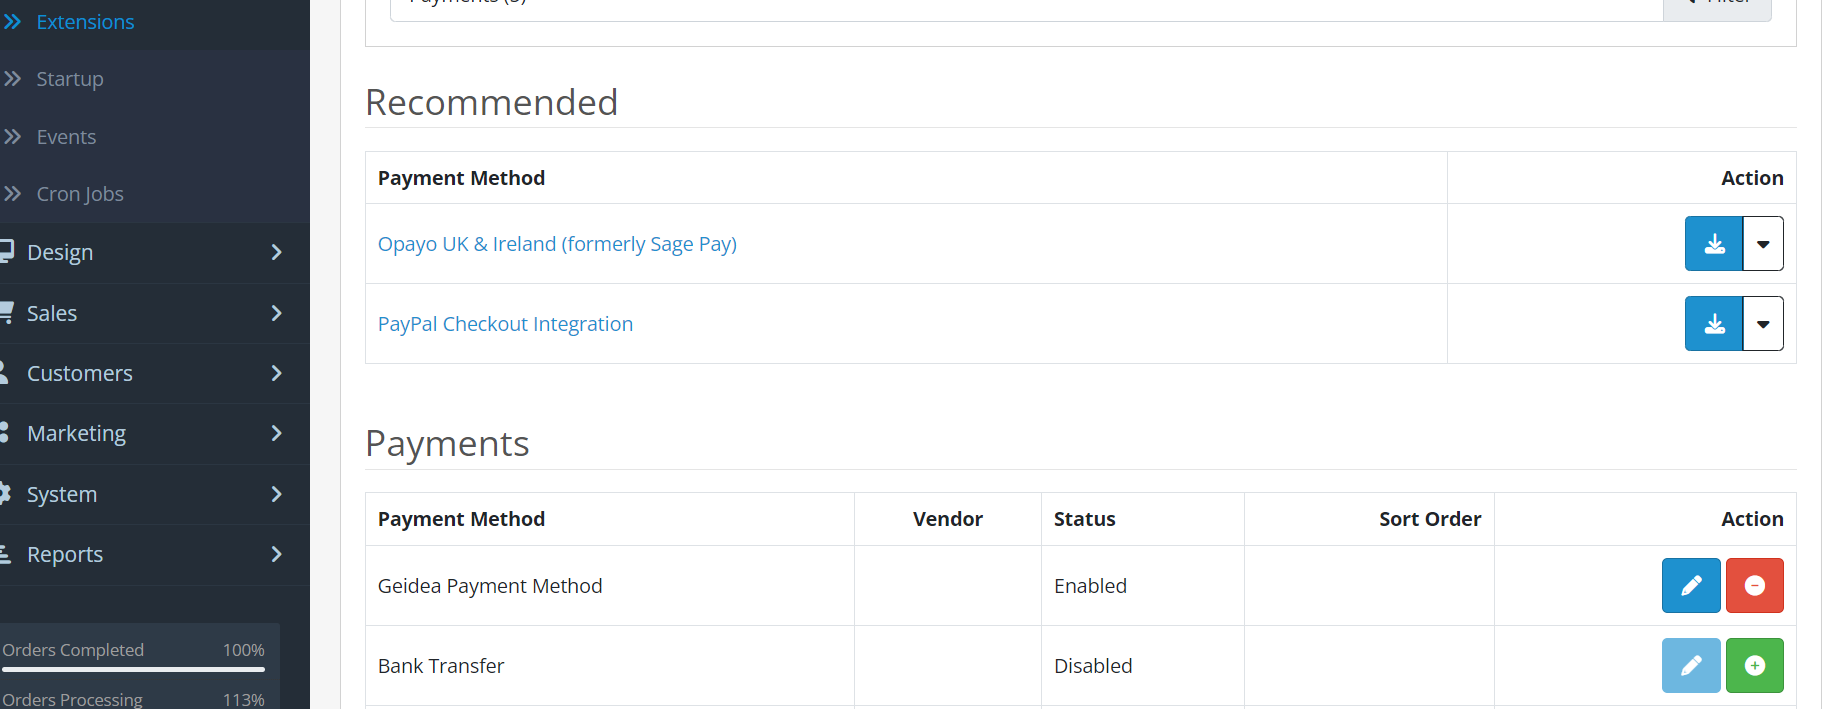
- Scroll down to the Geidea Online Payments plugin and click on the Edit icon.
- Configure your Geidea Online Payments plugin with the merchant credentials you have received from the Geidea team.
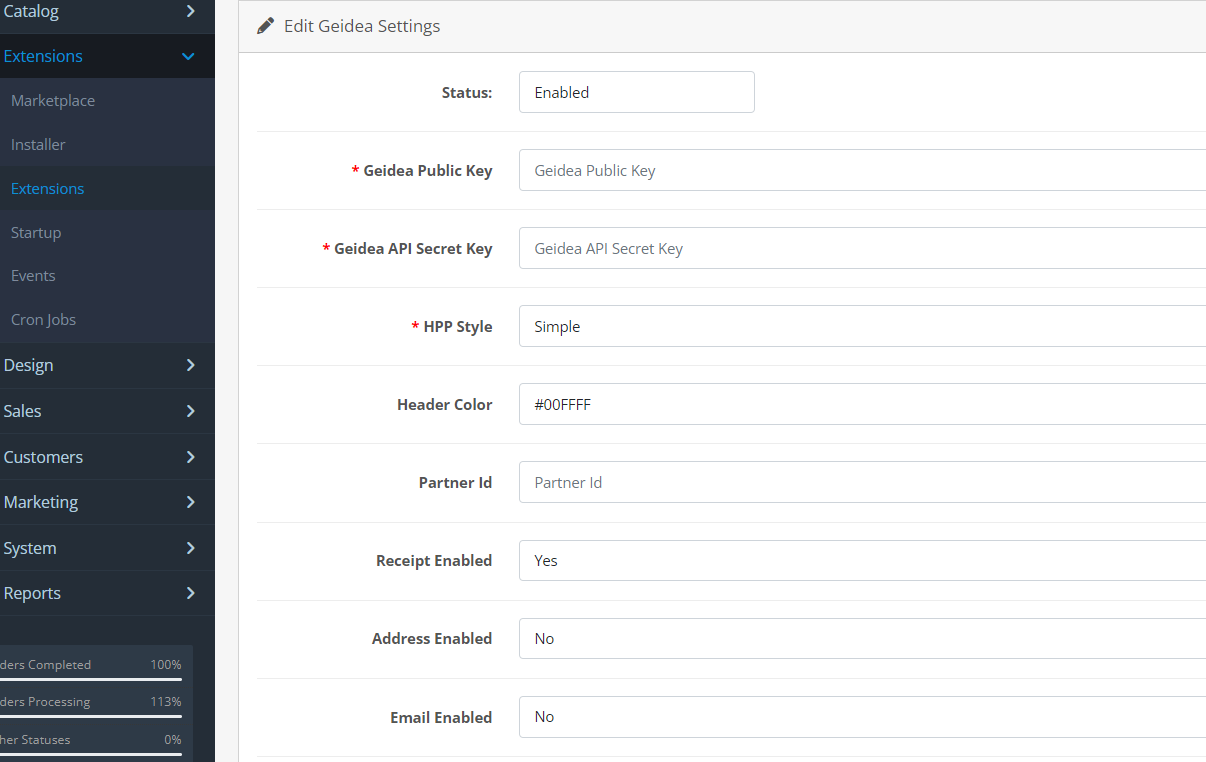
Setting option | Mandatory/Optional | Description | Comments |
|---|---|---|---|
Status | Mandatory | Checking this option enables you to Enable or Disable the | Dropdown |
Geidea Public key | Mandatory | Your Merchant Account ID (Merchant Public Key) that you should have received after creating an account with Geidea. Please refer to this link for details. | Sample: 1a2b3456-cb3b-11ed-afa1-0242ac120002 |
Geidea API Secret Key | Mandatory | Your Merchant account password (API Password) that you should have received after creating an account with Geidea. Please refer to this link for details. | Sample: 9z87y65x-cb3b-11ed-afa1-0242ac120002 |
Environment | Mandatory | Select the environment in which you would like to execute the transactions 1. EGY-PROD 2. KSA-PROD | Dropdown |
HPP Style | Optional | Hosted Payment Page Style | Dropdown |
Header Color | Optional | Hexadecimal code of the colour that is displayed at the top of the payment widget | # 333FFF |
Partner Id | Optional | Id of the Partner on Geidea's systems | pq12r345-cb3b-11ed-afa1-0242ac120002 |
Receipt Enabled | Optional | Used to select whether a summary of the payment transaction must be displayed after the transaction is complete | Dropdown |
Email Enabled | Optional | Displays the option to edit the email of the customer in the payment widget | Dropdown |
Phone Number Enabled | Optional | Displays the option to edit the phone number of the customer in the payment widget | Dropdown |
Address Enabled | Optional | Displays the option to edit the shipping and billing addresses of the customer in the payment widget | Dropdown |
Checkout logo | Optional | The icon displayed at the time of placing the order during the checkout process |
- Click on the Save icon at the top right corner of the web page.

- After following these steps, the Geidea Online Payments plugin should be configured successfully.
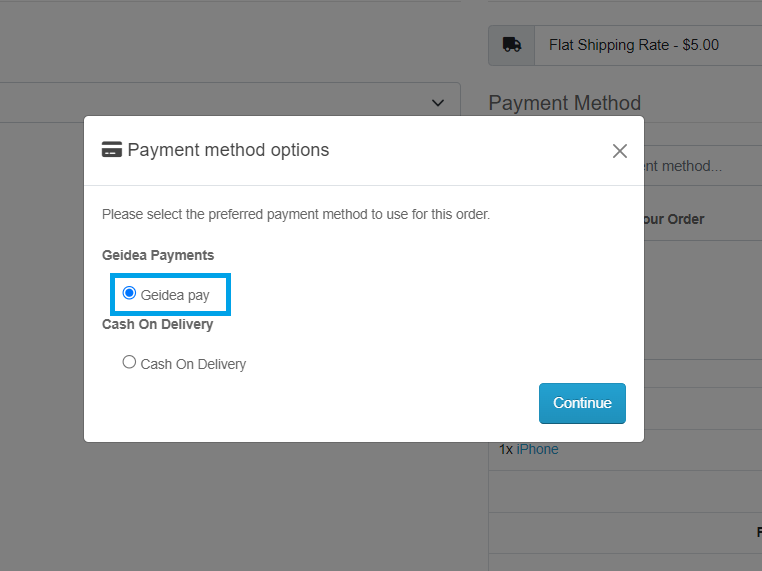
You can now test the gateway by completing a test checkout process.
Geidea Checkout
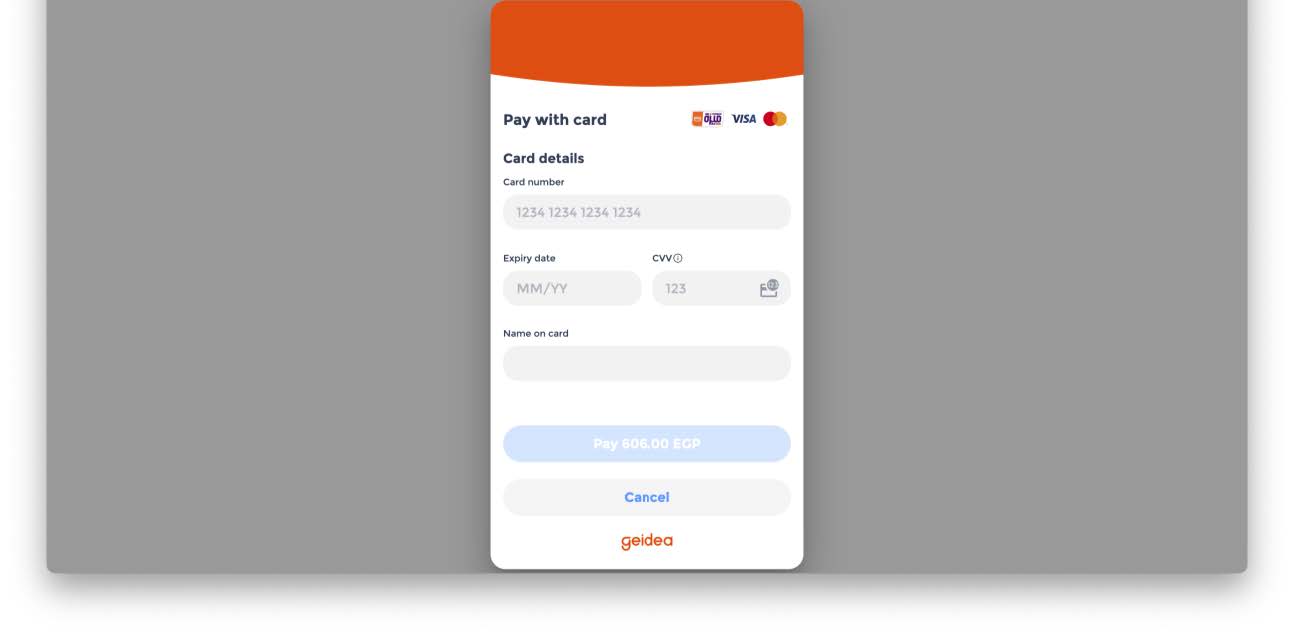
Geidea Hosted Payment Page
Updated 8 months ago