Shopify
Introduction
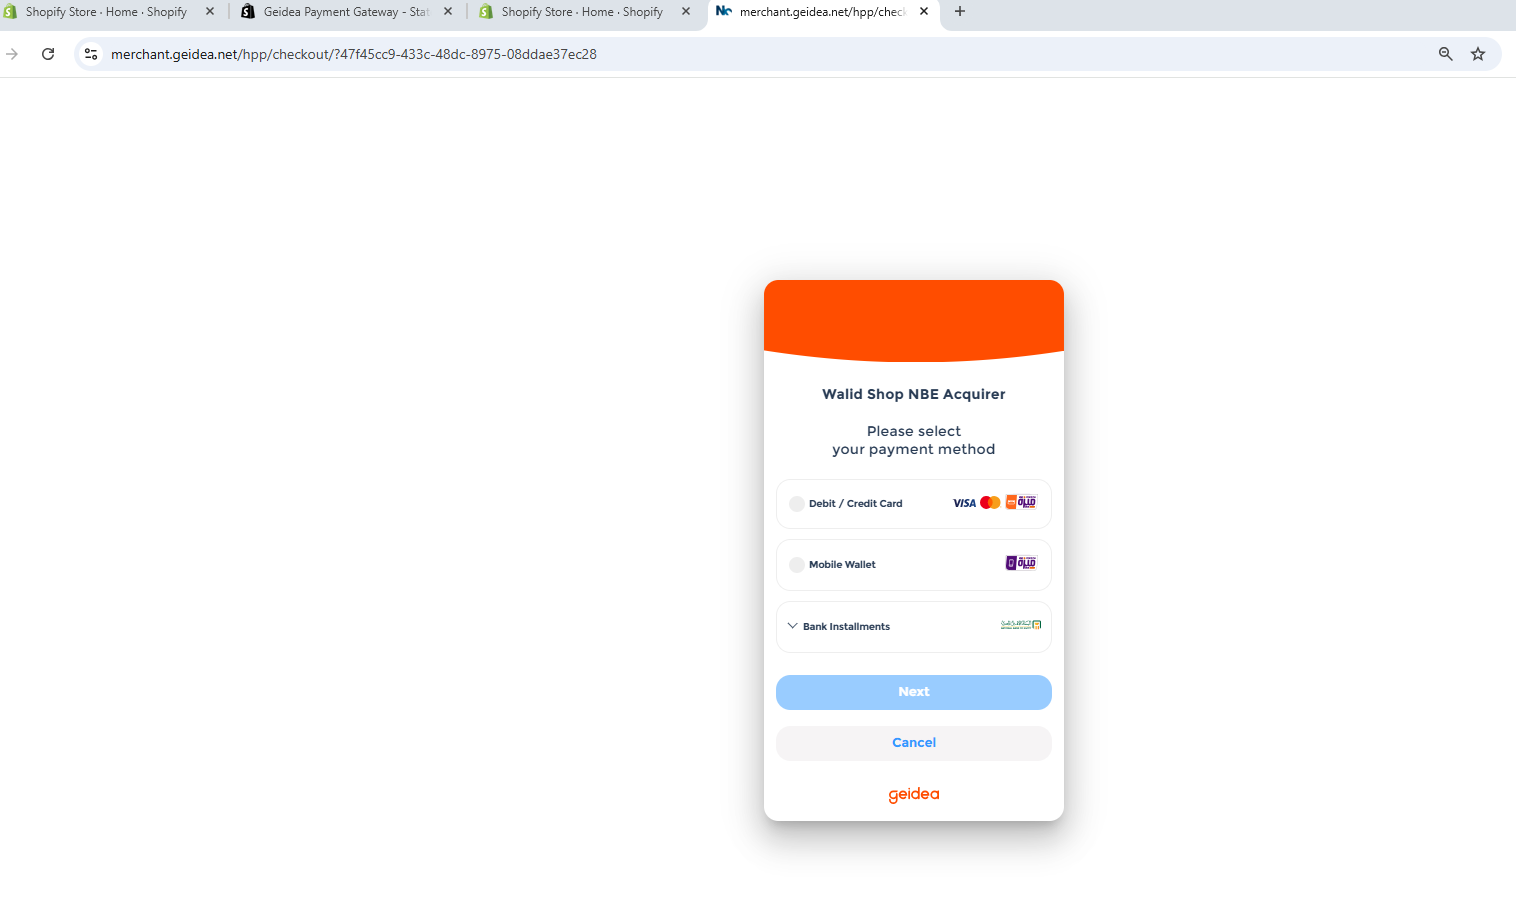
Geidea Online Payments can be added to your Shopify store. We achieve seamless integration: end-to-end compatibility between Shopify and Geidea, without technical complications.
Follow the installation & configuration setup to start accepting payments.
Plugin Installation Steps
Step 1: Log in to Shopify
- Go to: https://www.shopify.com/login
- Enter credentials to access the Admin dashboard.
Step 2: Find the Plugin
- Go to GeideaPay Plugin (to be able to access the Geidea App plugin)

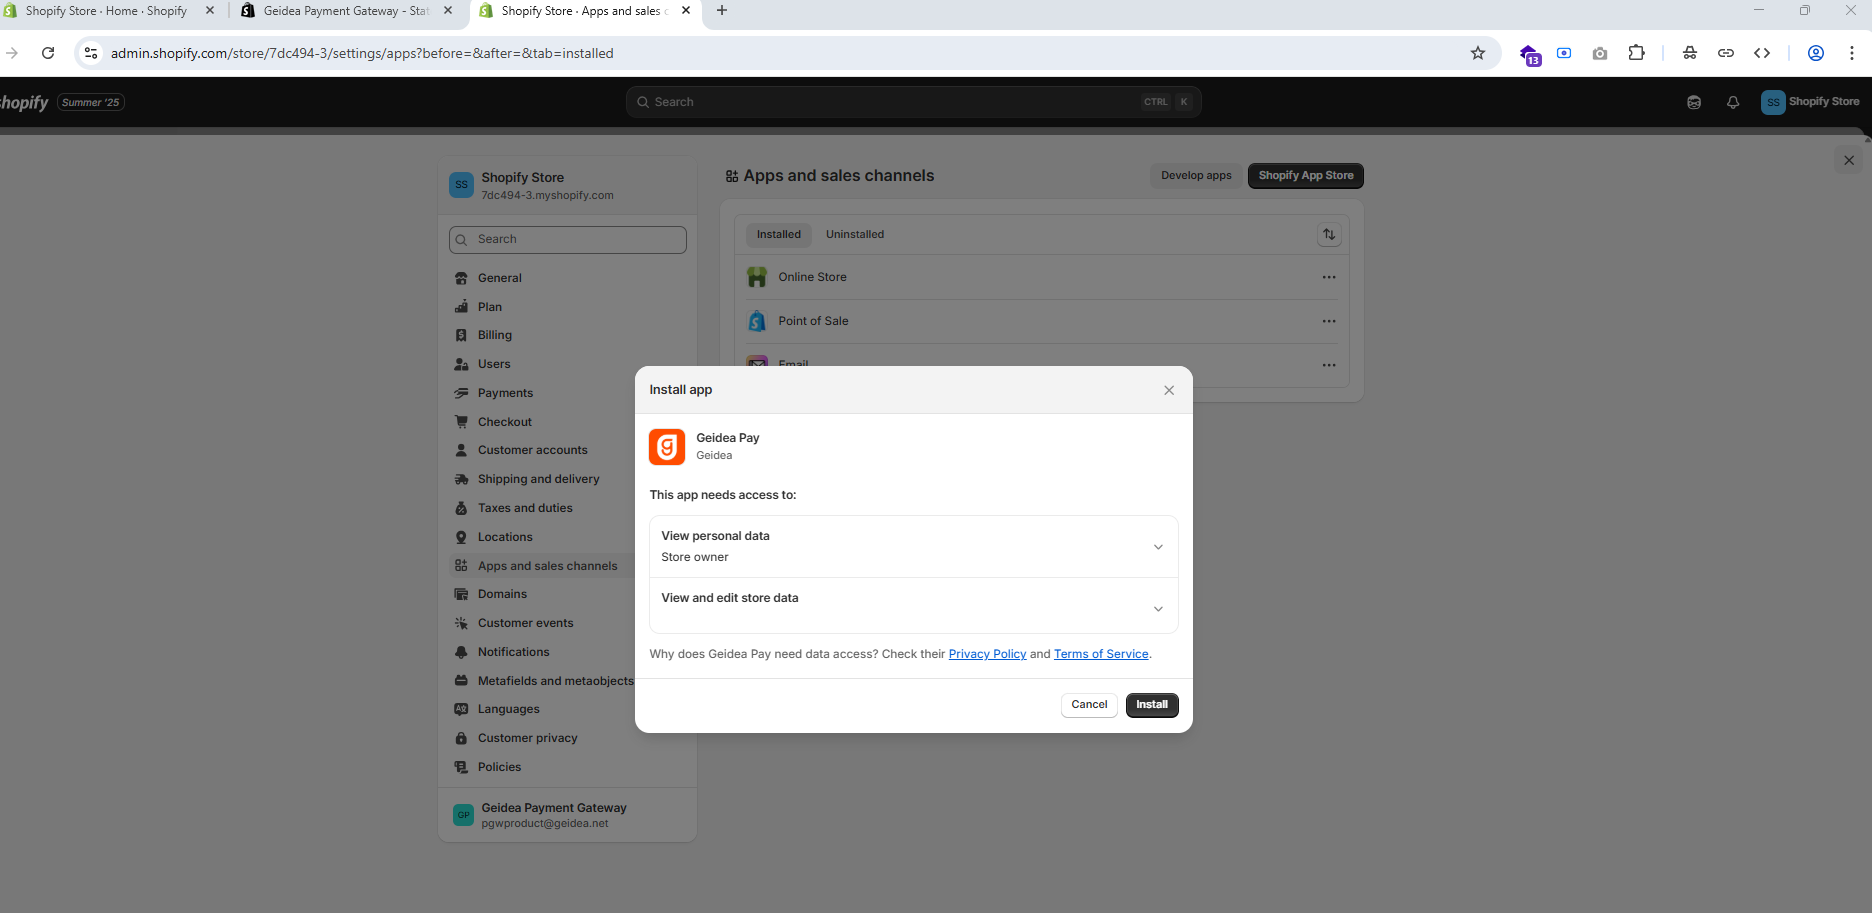
Step 3: Install the Plugin
- Click Install App.
- Approve permissions requested by the app.
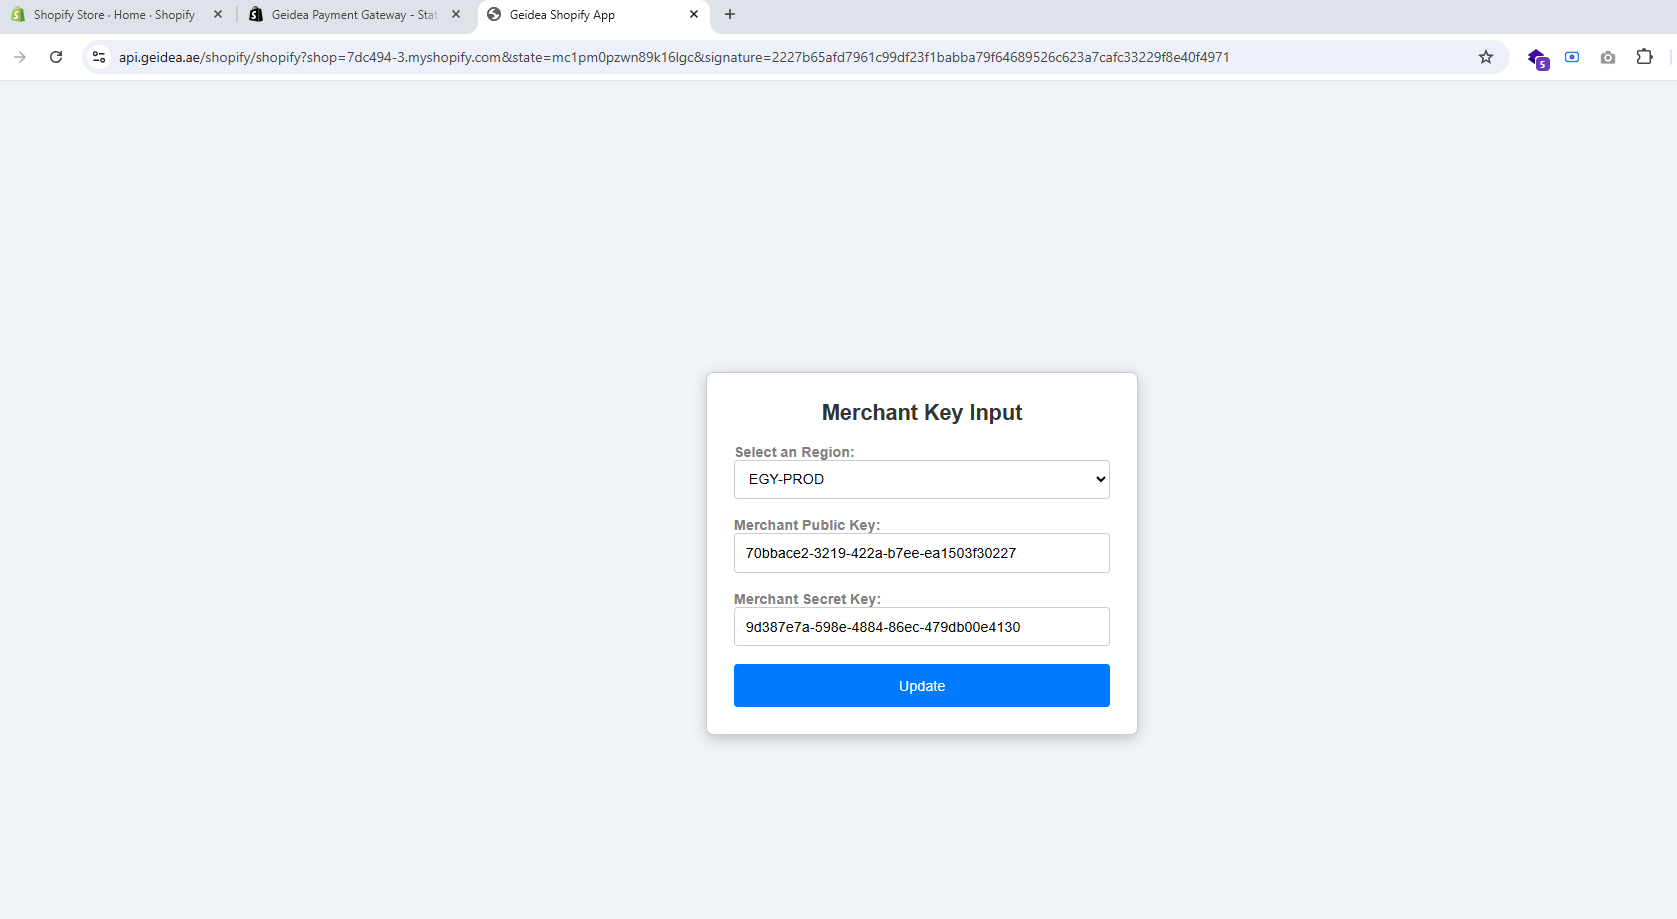
Step 4: Plugin configuration
- Select your region accordingly
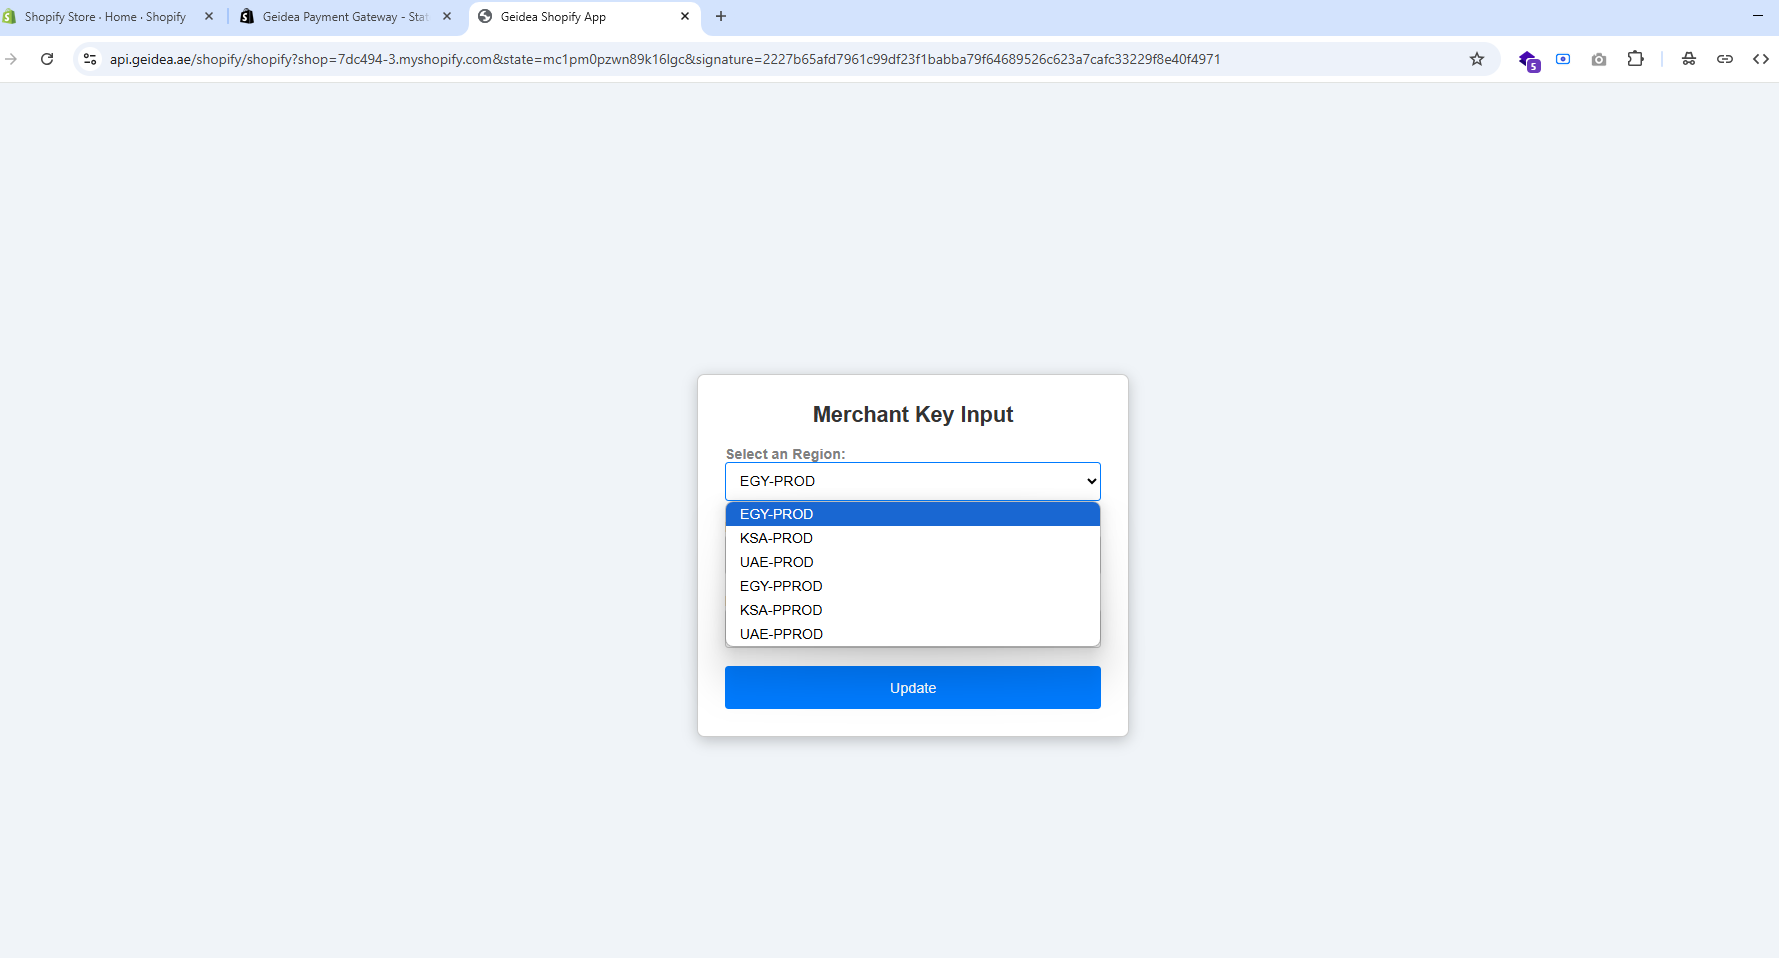
The country name must be followed by PROD for instance (EGY-PROD)
- Enter your API keys that you've received from Geidea team
| Attribute | Description |
|---|---|
| Active | Controls whether to activate or deactivate Geidea Online Payments at checkout |
| Mode | Controls whether you are using a test or a live environment |
| Public Key (Production) | Public Key for the production environment |
| API Password (Production) | API Password for the production environment |
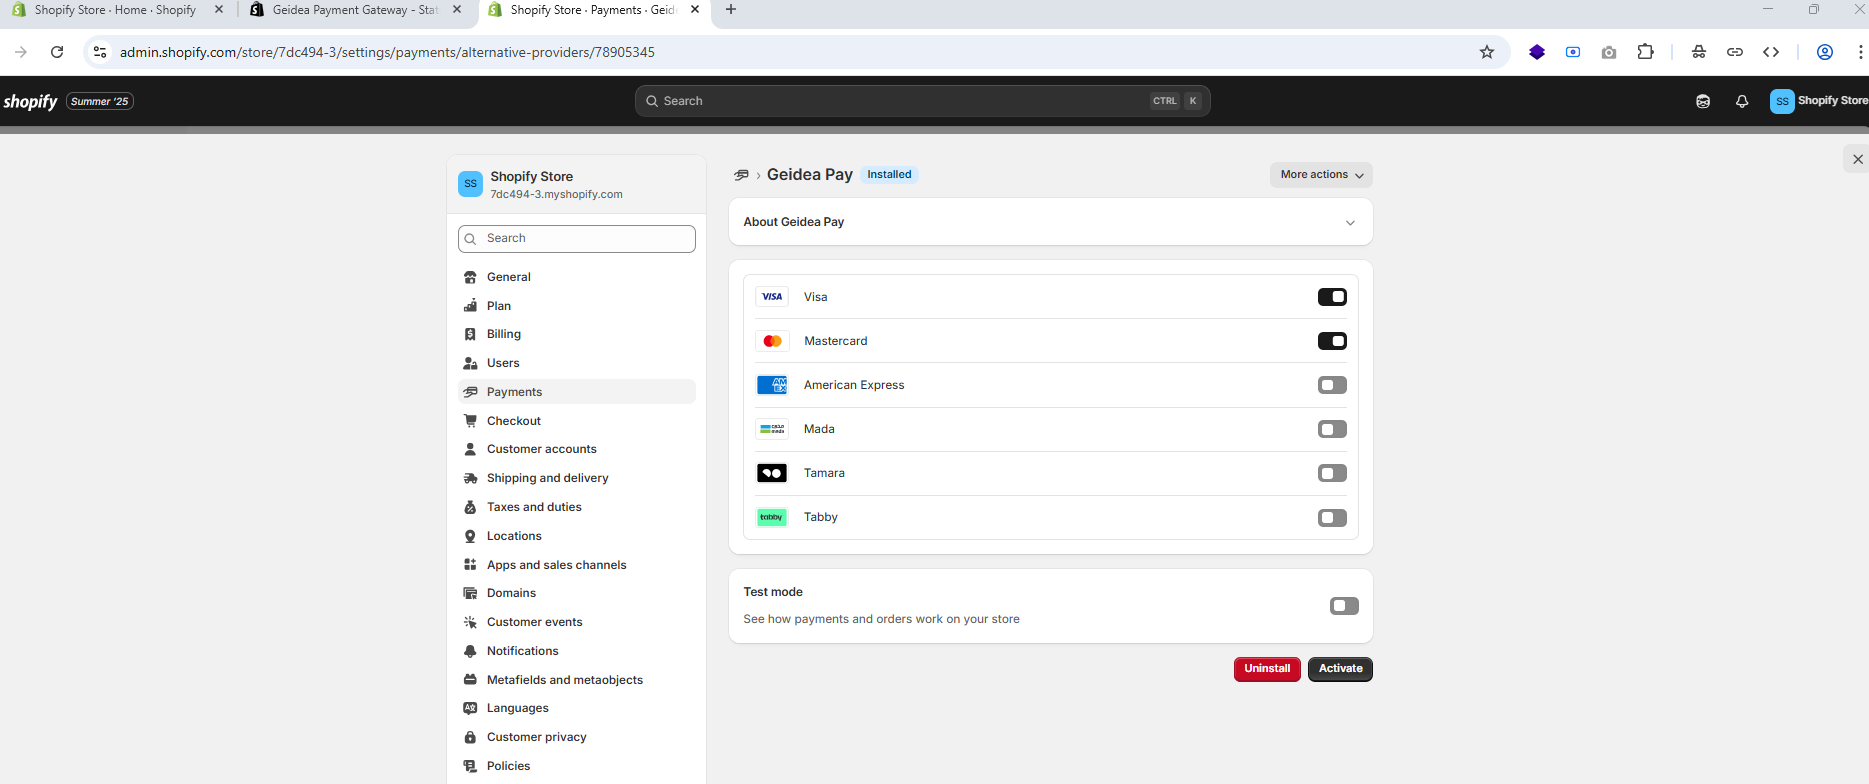
Step 5: Plugin Activation
- Enable various payment methods according to your region
- Activate your plugin
Support & Contact
Should you encounter any issues or have any inquiries, please do not hesitate to contact us at [email protected].
Updated 8 months ago
Did this page help you?