WordPress plugin for WooCommerce
This document presents the steps for integrating the Geidea payment gateway with your WooCommerce store.
Overview
WooCommerce is an open-source e-commerce plugin for WordPress. It is designed for small to large online merchants using WordPress to set up your e-commerce site seamlessly and quickly. Geidea Payments Online is a gateway plugin that extends WooCommerce, allowing you to take payments through Geidea. You can easily accept credit card payments and other payments through wallet providers or Buy-Now-Pay-Later (BNPL) providers.
Integrating our payment gateway with WooCommerce's online stores has never been easier. Through the Geidea Online Payments plugin in the WordPress repository, our payment gateway can be seamlessly integrated with just a few lines of code.
Pre-requisites
You will need a merchant account with Geidea and the following software running in your hosting environment to accept payments using the Geidea payment gateway.
| Software | Version |
|---|---|
| WordPress | 6.0.2 or greater |
| WooCommerce plugin for WordPress | 3.4.6 or greater |
| WooCommerce database | 3.4.6 or greater |
| Geidea Online Payments plugin | 3.5.2 |
| PHP | 7.4 or greater |
While we make every effort to test software or module or plugin updates rigorously, there is no guarantee that a plugin or module will work seamlessly with your hosting environment. So please back up your website before updating any plugins or modules. This helps you restore your website from backup in case you run into unexpected errors.
Software and plugin or module updates involve programming code changes. The updates may often request upgrades to the server or other hosting software such as PHP as well.
Integration Steps
After you install the WooCommerce plugin and configure your online store, please follow the following steps to accept payments using the Geidea payment gateway.
Step 1: Install Geidea Payments Online plugin for WooCommerce
Method 1
Zip package installation method
- Download the zip package of the plugin here.
Please do not rename the downloaded plugin file or modify the contents of the downloaded plugin. This may crash your WordPress instance or cause the installation process to fail or malfunction.
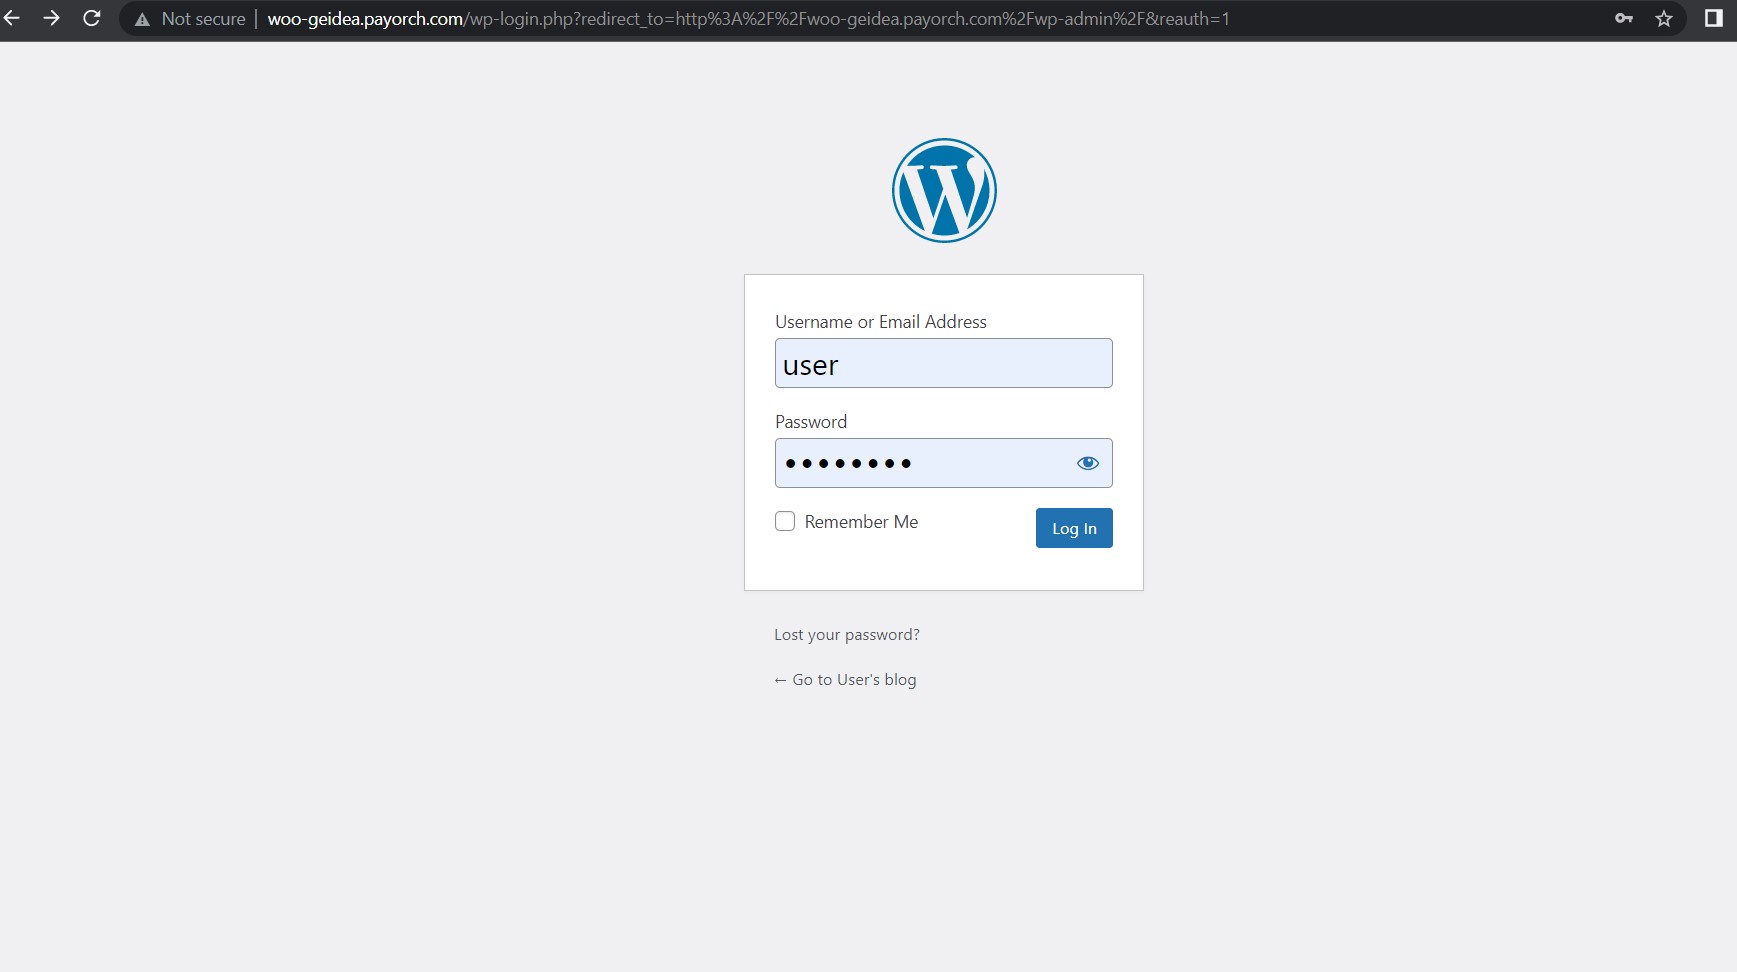
- Sign in to the admin panel of your WordPress website
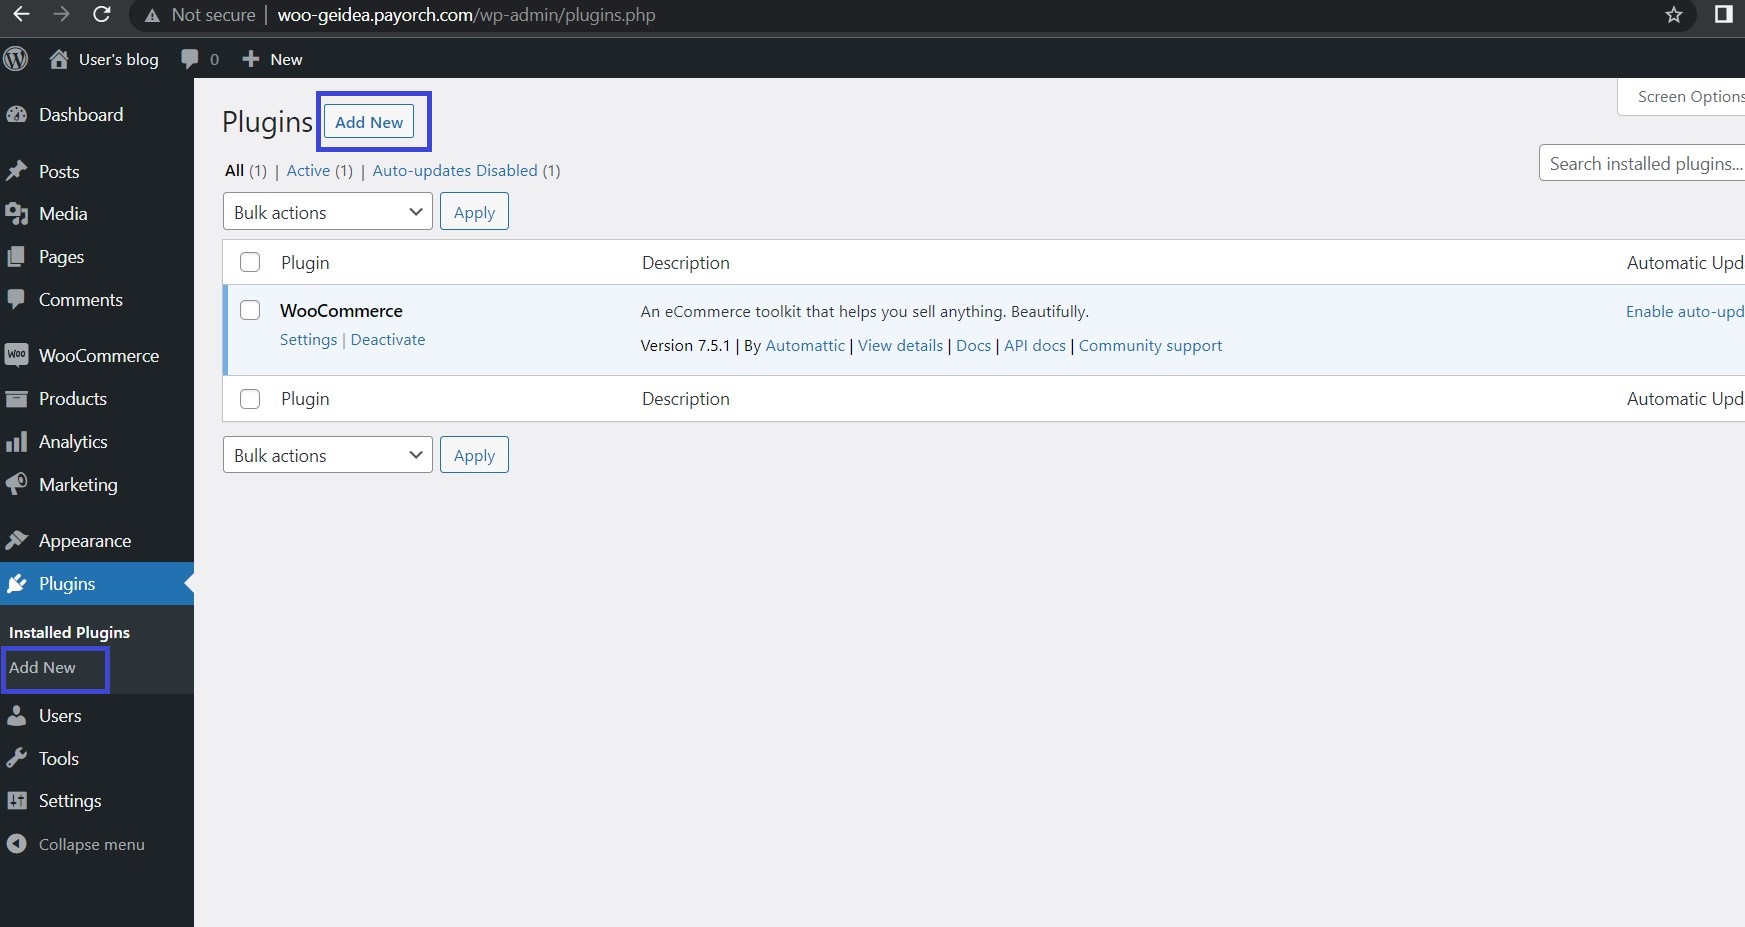
- On your WordPress Dashboard, navigate to the Admin Menu, go to Plugins => Add New.
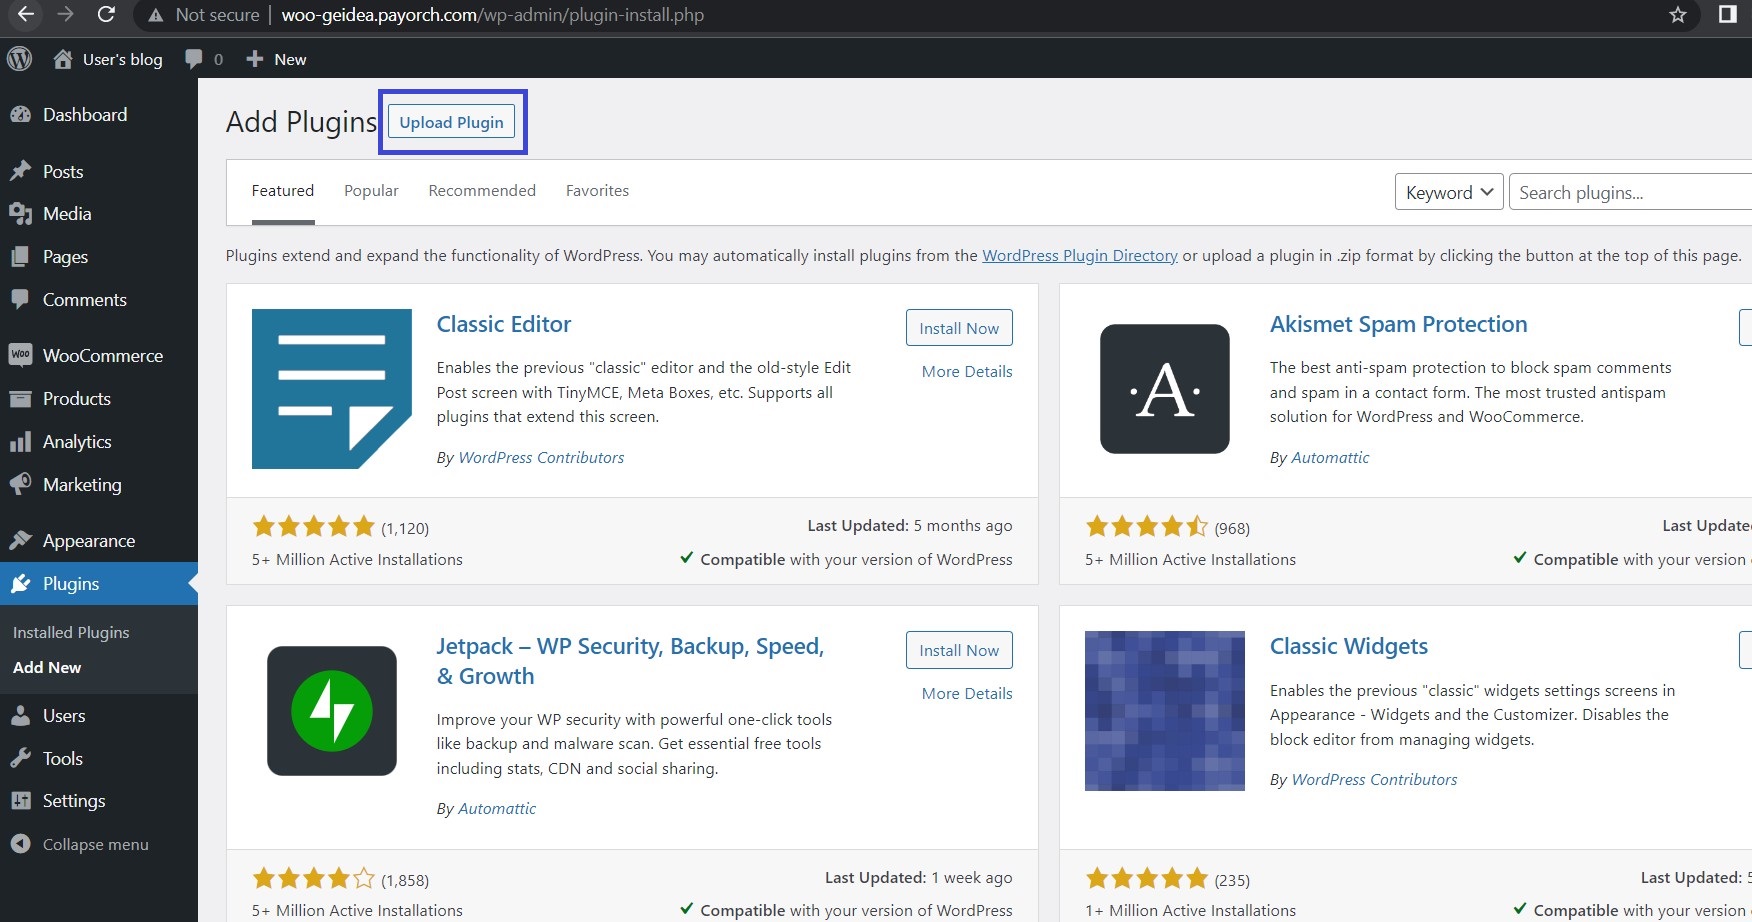
- Click on the
Upload Pluginbutton on the top left corner of the page.
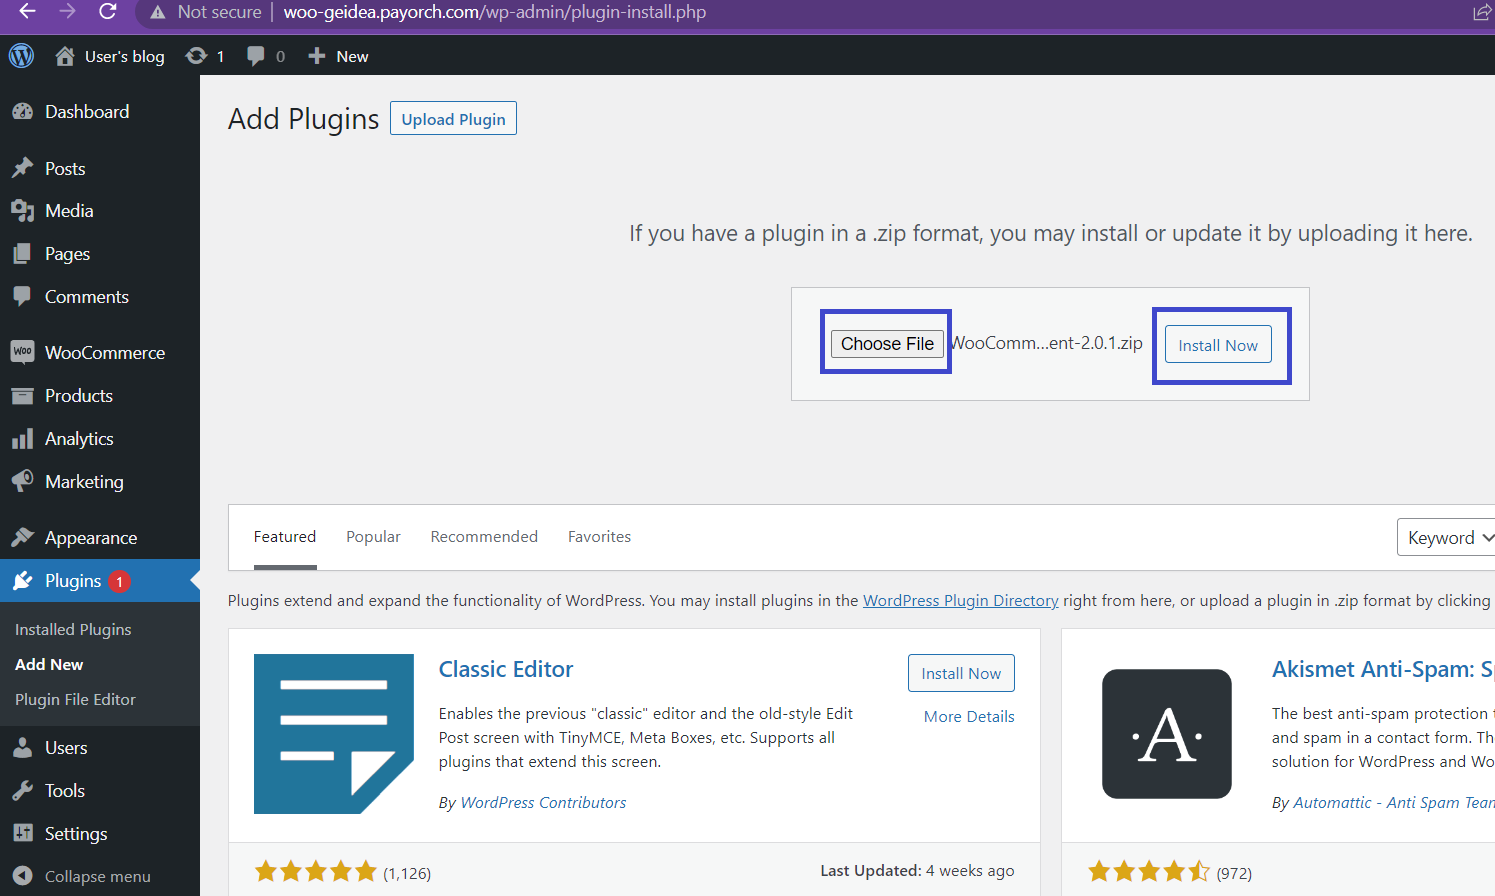
- Click on the
Choose Filebutton and browse for the zipped plugin package on your local machine. Select the previously downloaded zipped package of the Geidea online payments plugin and click on theInstall Nowbutton.
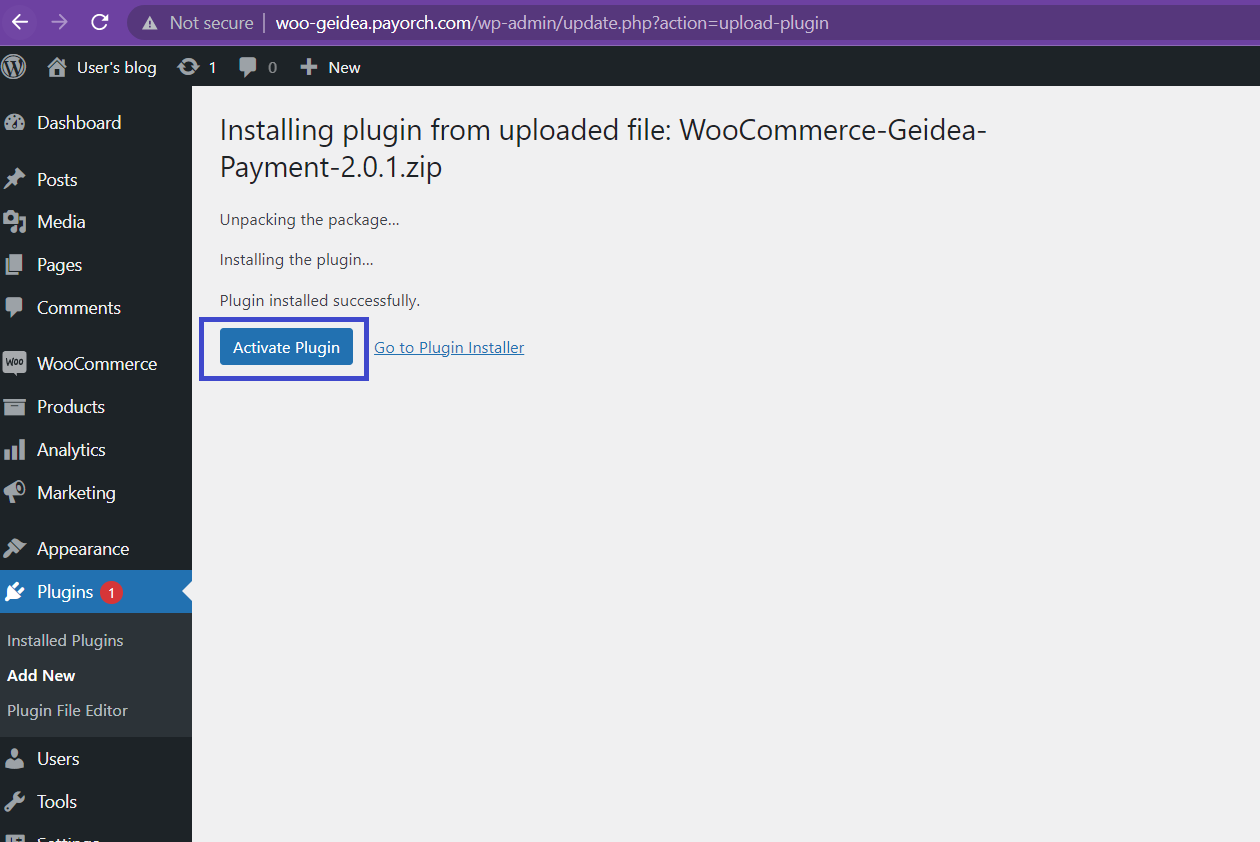
After the plugin is installed, click on the Activate Plugin button to activate the Geidea Online Payments for WooCommerce plugin
Method 2
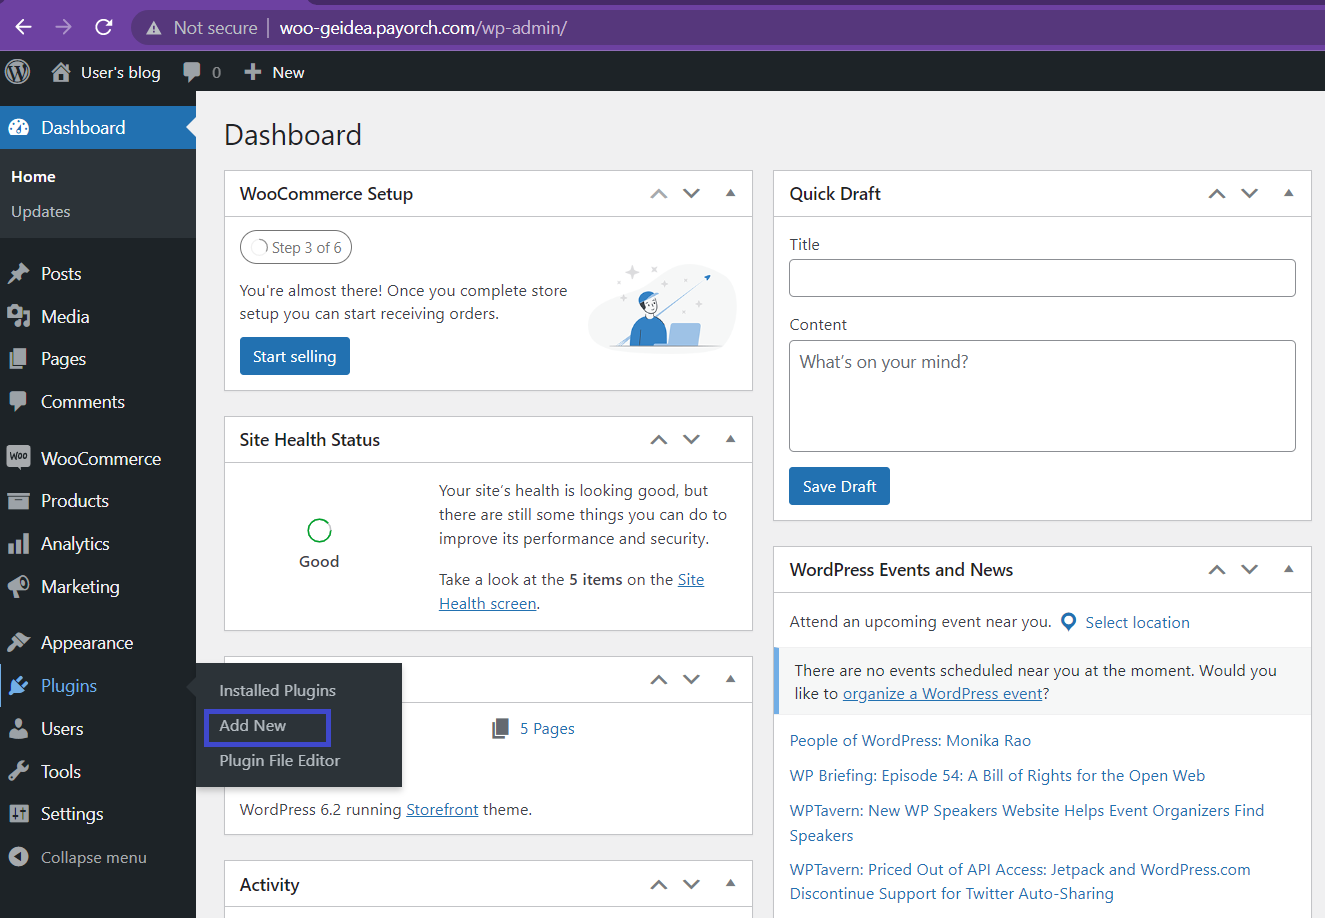
- After configuring your online e-commerce store using the WooCommerce plugin, navigate to the Dashboard of your WordPress site and hover over the Plugins menu. In the side menu that appears, click on Add New
- In the Search plugins... textbox, Enter Geidea and press the Enter key
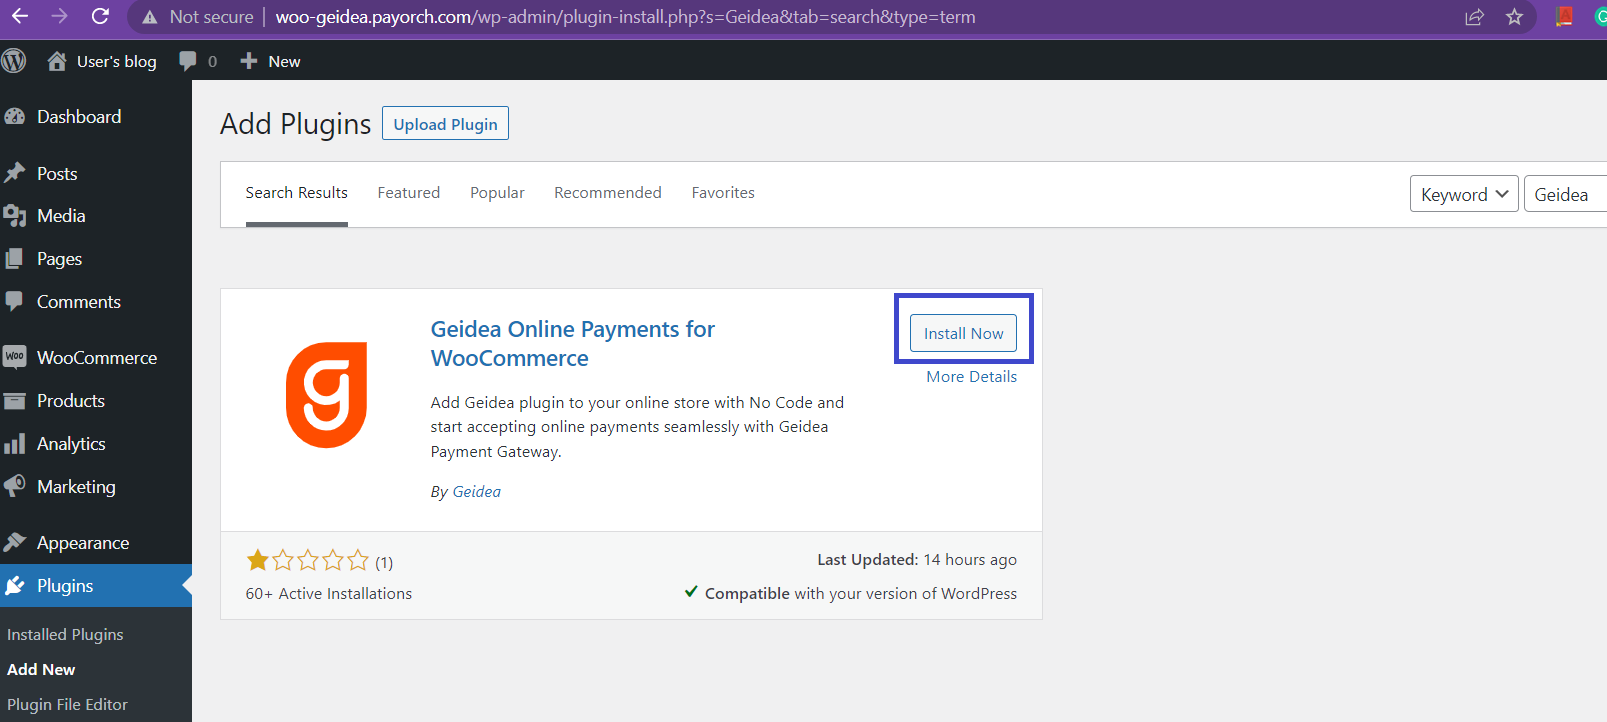
- Click on Install Now button to install the Geidea Online Payments for WooCommerce plugin
- After the above step, the plugin is installed. You can now click on the
Activate Pluginbutton to activate the plugin to accept payments from your customers.
Once the Geidea online payments plugin is successfully activated, you will be redirected to the Installed Plugins page.

Step 2: Set up and configure the Geidea Online Payments plugin
Geidea Online Payments pluginOnce you have successfully installed and activated the Geidea online payments plugin, you need to configure the plugin to start accepting payments from your customers.
The configuration process for the
Geidea online payments pluginis simple and as easy as filling an online form.
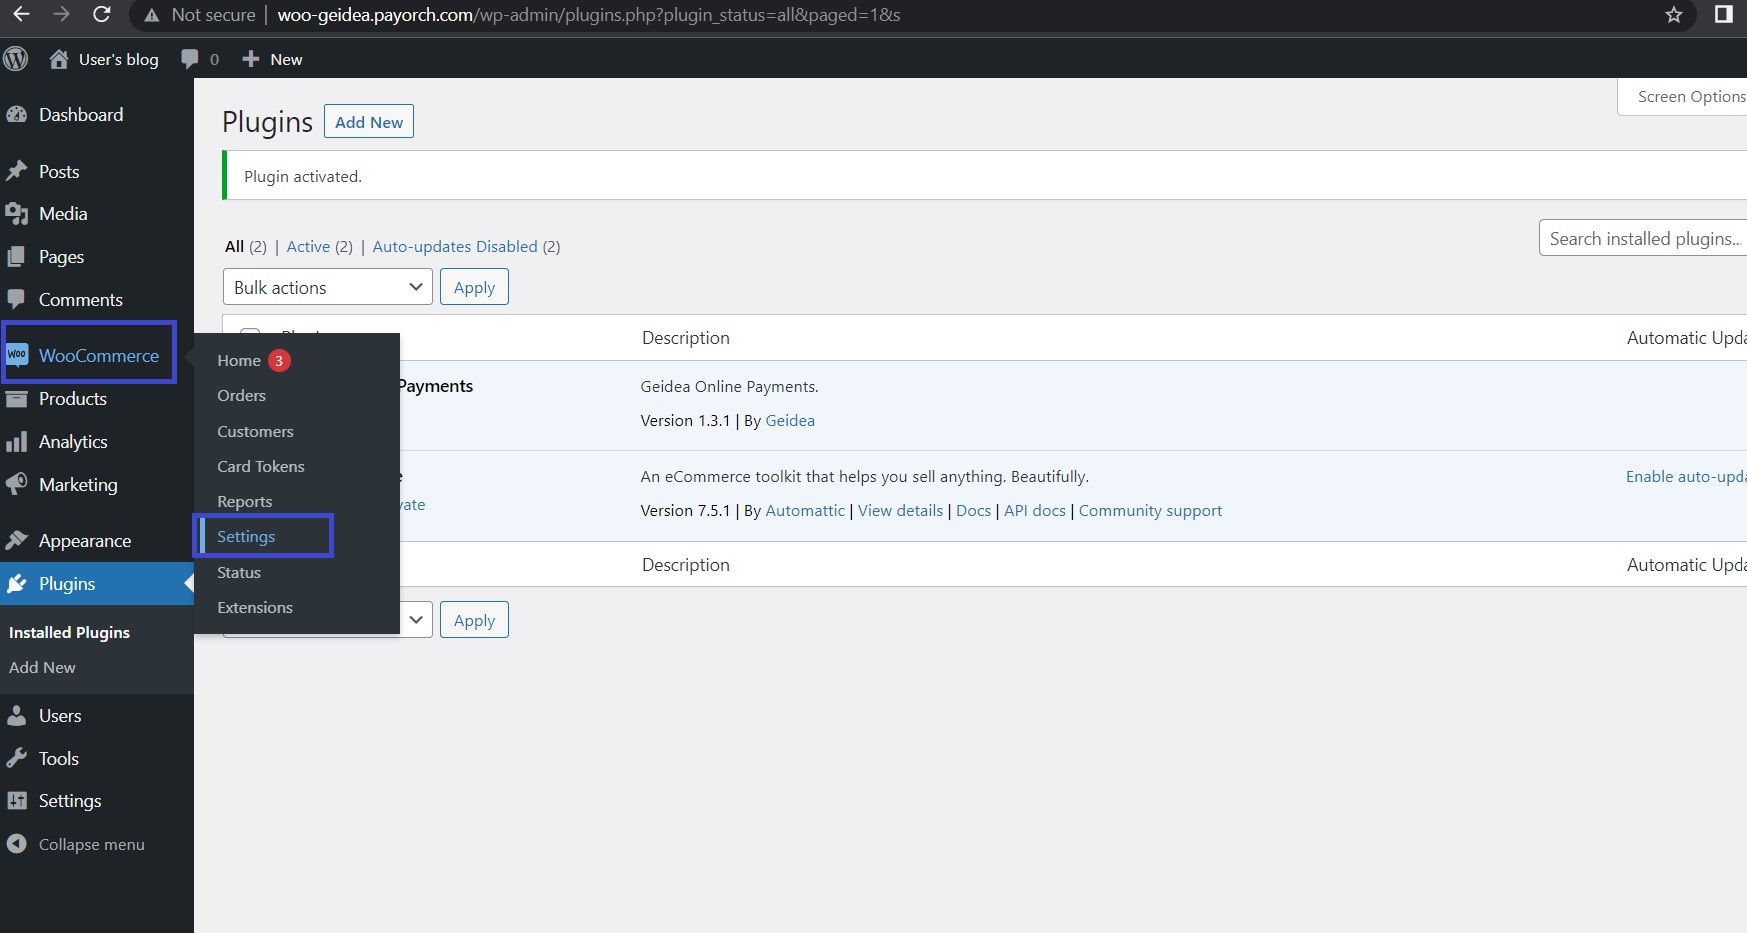
- Begin by hovering over the
WooCommerceoption in the side navigation and then click onSettingsoption in the slider menu.
- Click on the
Paymentstab on the screen
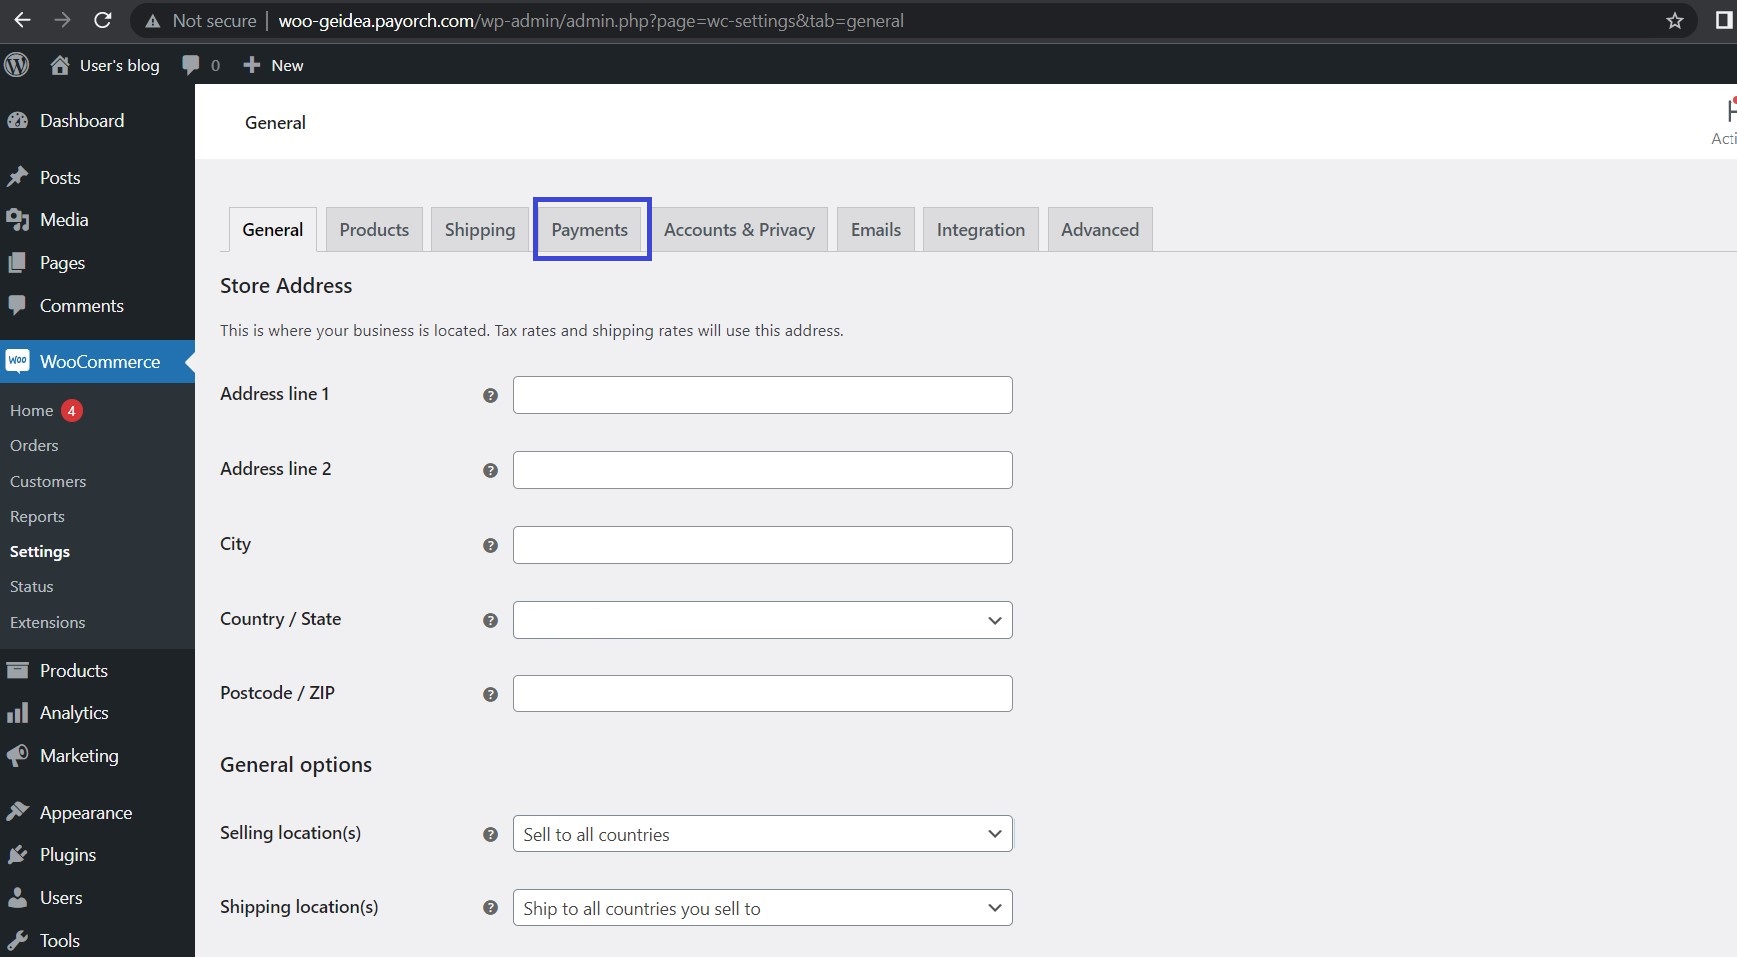
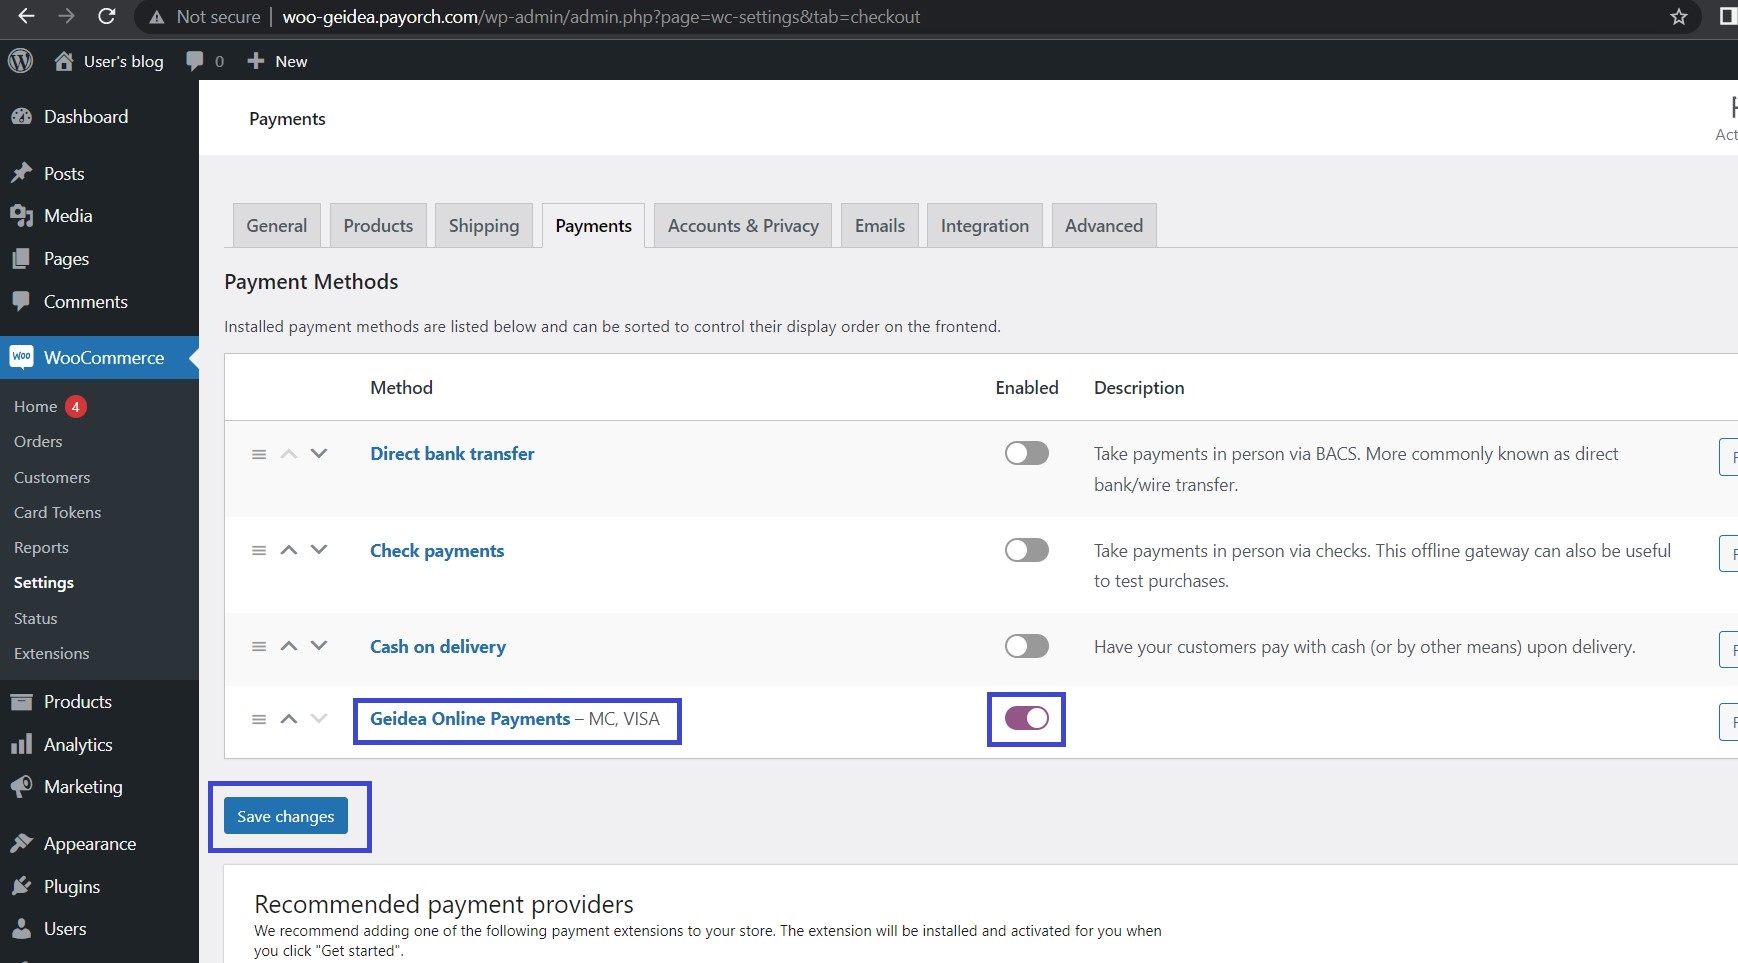
- Click on the toggle button to enable the
Geidea online paymentsplugin. After enabling the toggle button against theGeidea online paymentsplugin, click on theSave Changesbutton on the page. You can now click on theGeidea online paymentslink to access the configuration form for the plugin.
- Once you click on the
Geidea Online Paymentslink as mentioned above, you will be redirected to the following settings screen. We explained each of the available options in the table below the following image.
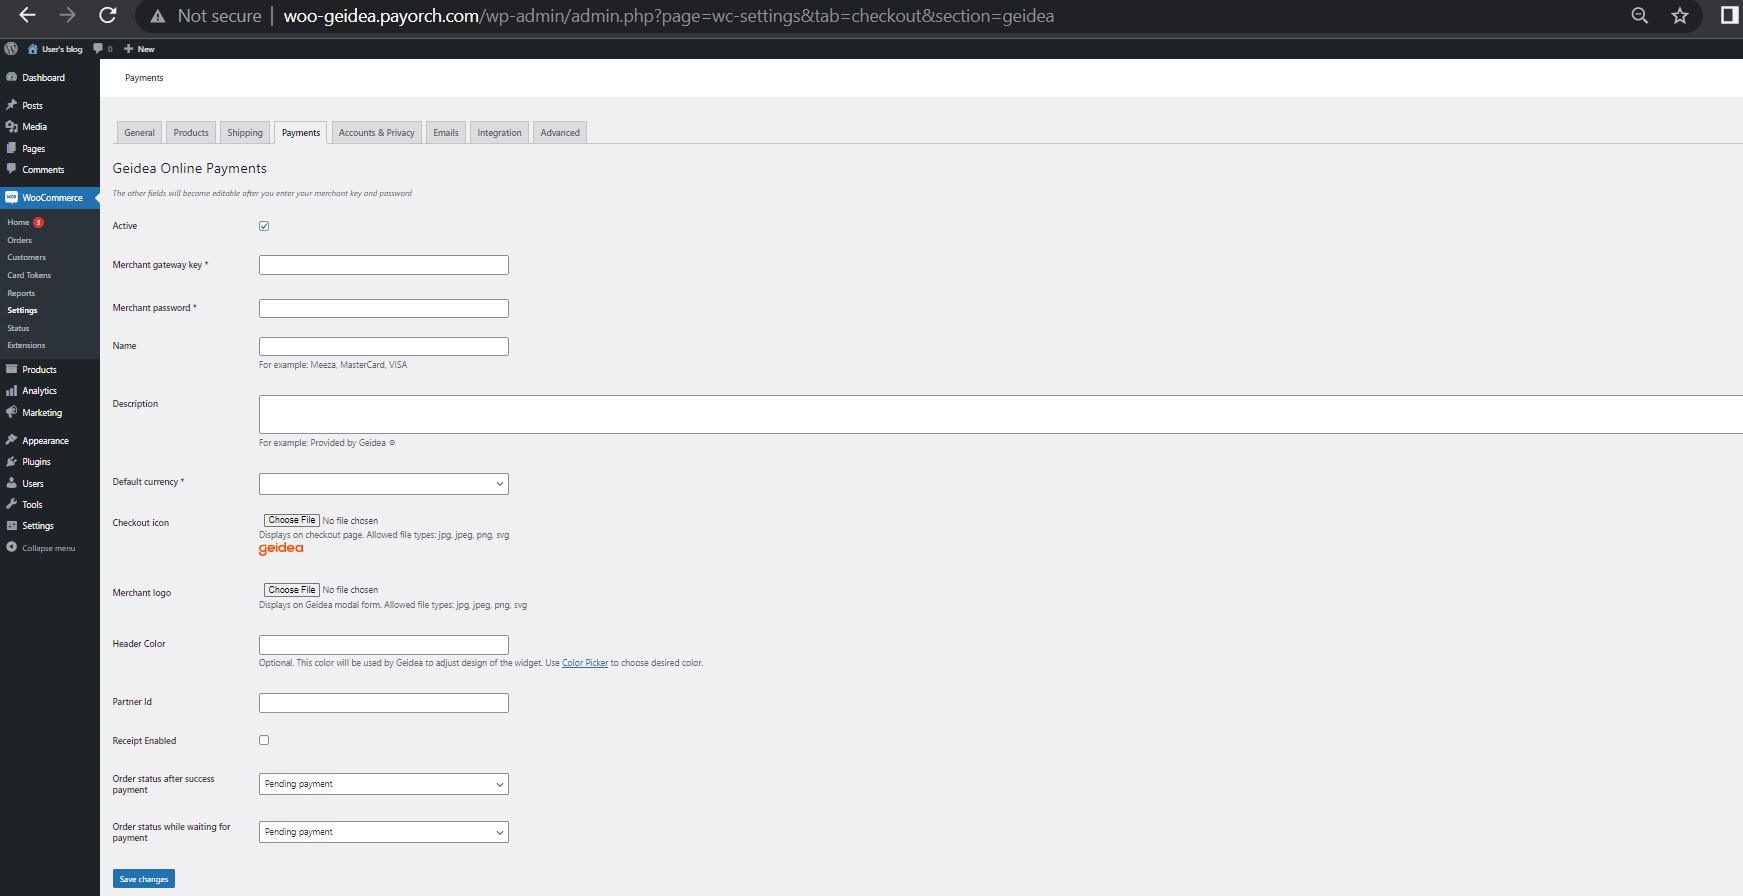
Configuration options for the Geidea plugin
Setting option | Mandatory/Optional | Description | Comments |
|---|---|---|---|
Active | Mandatory | Checking this option enables you to Enable or Disable the | Checkbox |
Environment | Mandatory | Select the environment in which you would like to execute the transactions
| Dropdown |
Merchant gateway key | Mandatory | Your Merchant Account ID (Merchant Public Key) that you should have received after creating an account with Geidea. Please refer to this link for details. | Sample: 1a2b3456-cb3b-11ed-afa1-0242ac120002 |
Merchant password | Mandatory | Your Merchant account password (API Password) that you should have received after creating an account with Geidea. Please refer to this link for details. | Sample: 9z87y65x-cb3b-11ed-afa1-0242ac120002 |
Name | Optional | Identifier that is appended to the plugin name that enables you to easily identify the payment method. This text is appended to the plugin name in the | Visa, Mazda |
Description | Optional | Text used to describe the plugin | Powered by Geidea |
Default Currency | Mandatory | Currency in which payments are accepted by the store. These currencies are limited to the currencies configured for your Merchant ID.
| SAR |
Checkout Icon | Optional | The icon displayed at the time of placing the order during the checkout process | |
Merchant Logo | Optional | The logo of the merchant is presented on the payment widget | |
Header Color | Optional | Hexadecimal code of the color that is displayed at the top of the payment widget |
|
Hide Geidea Logo | Optional | Hides Geidea logo in the widget | Checkbox |
Partner Id | Optional | Id of the Partner on Geidea's systems | pq12r345-cb3b-11ed-afa1-0242ac120002 |
Receipt Enabled | Optional | Used to select whether a summary of the payment transaction must be displayed after the transaction is complete | Checkbox |
Email Enabled | Optional | Displays the option to edit the email of the customer in the payment widget | Checkbox |
Phone Number Enabled | Optional | Displays the option to edit the phone number of the customer in the payment widget | Checkbox |
Address Enabled | Optional | Displays the option to edit the shipping and billing addresses of the customer in the payment widget | Checkbox |
Save Card | Optional | Saves the card used by the customer as an encrypted token for future use. | Checkbox |
Language | Mandatory | Used to set the language (English or Arabic) in which the payment receipt is displayed after the transaction | Drop-down |
Hosted Payment Page Style | Optional | Used to set the experience for the payment widget. It has 2 values - Simple, Compressed | Drop-down |
Order status after successful payment | Optional | Status to be assigned to order after successful payment |
|
Order status while waiting for payment | Optional | Status to be assigned to order after successful payment |
|
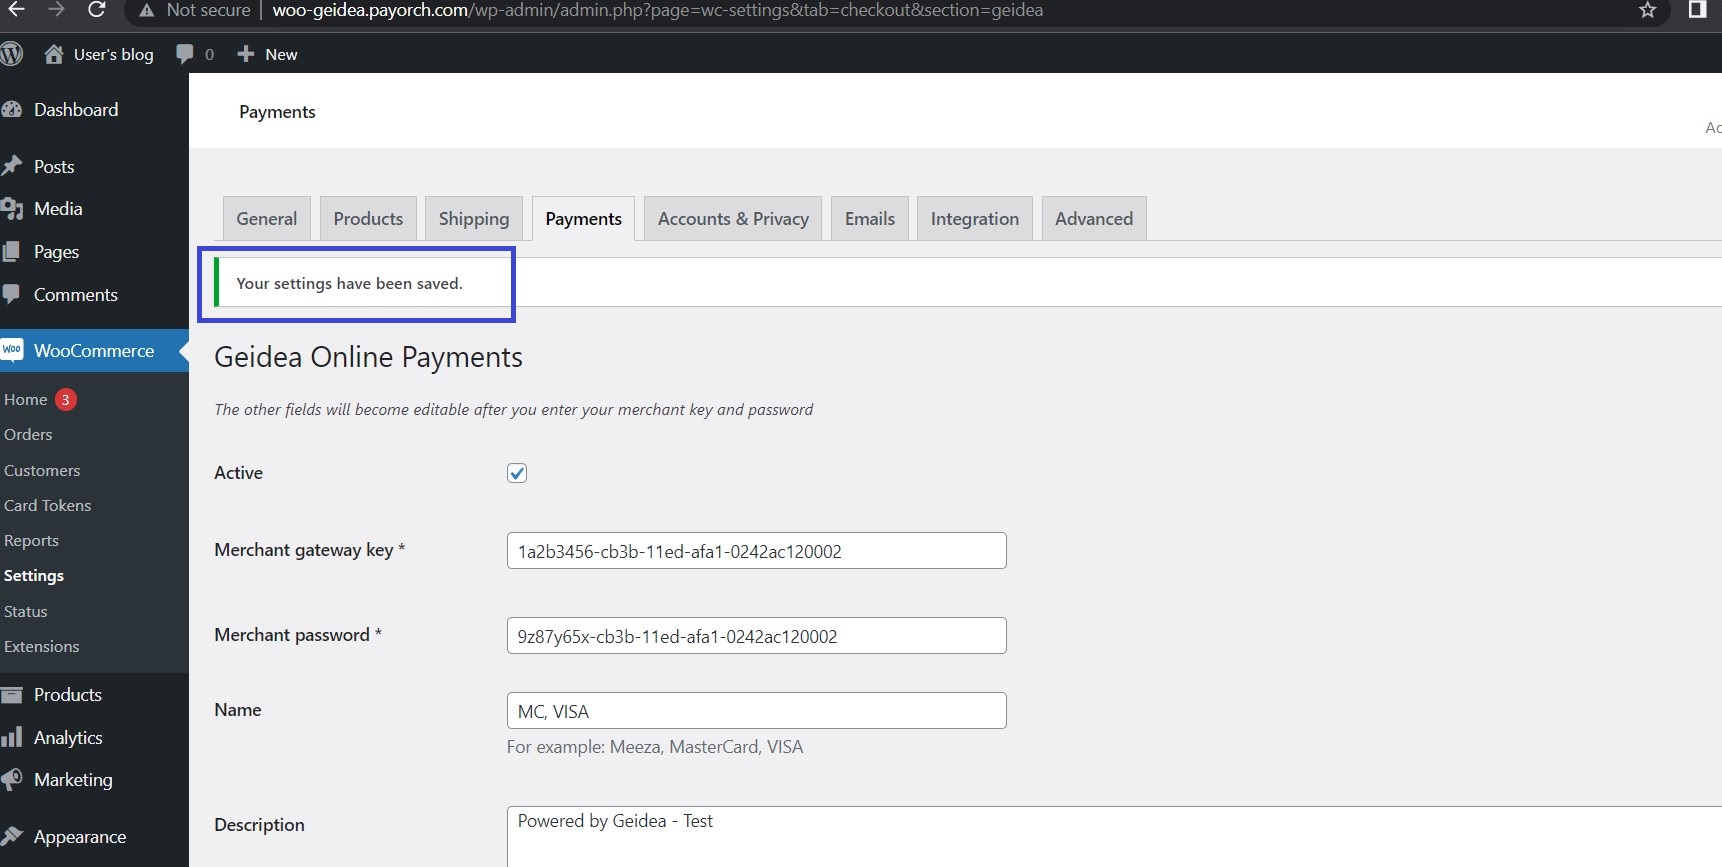
- Click the
Save Changesbutton once you finish configuring the plugin. A status message is displayed on the changes are saved.
Please be aware that only the following special characters are allowed in the Name, description and category for the order items added.Allowed characters: ' '; ','; '.'; '-'
Supported Payment Methods
- Credit & Debit Cards - Meeza, MasterCard, Visa
- Mobile Wallet - Meeza
Step 3: Validating the plugin
- Create a test order on your online store by adding a product to the cart and initiating a checkout. You should be able to view the
Checkout iconand theDescriptionconfigured for the plugin.
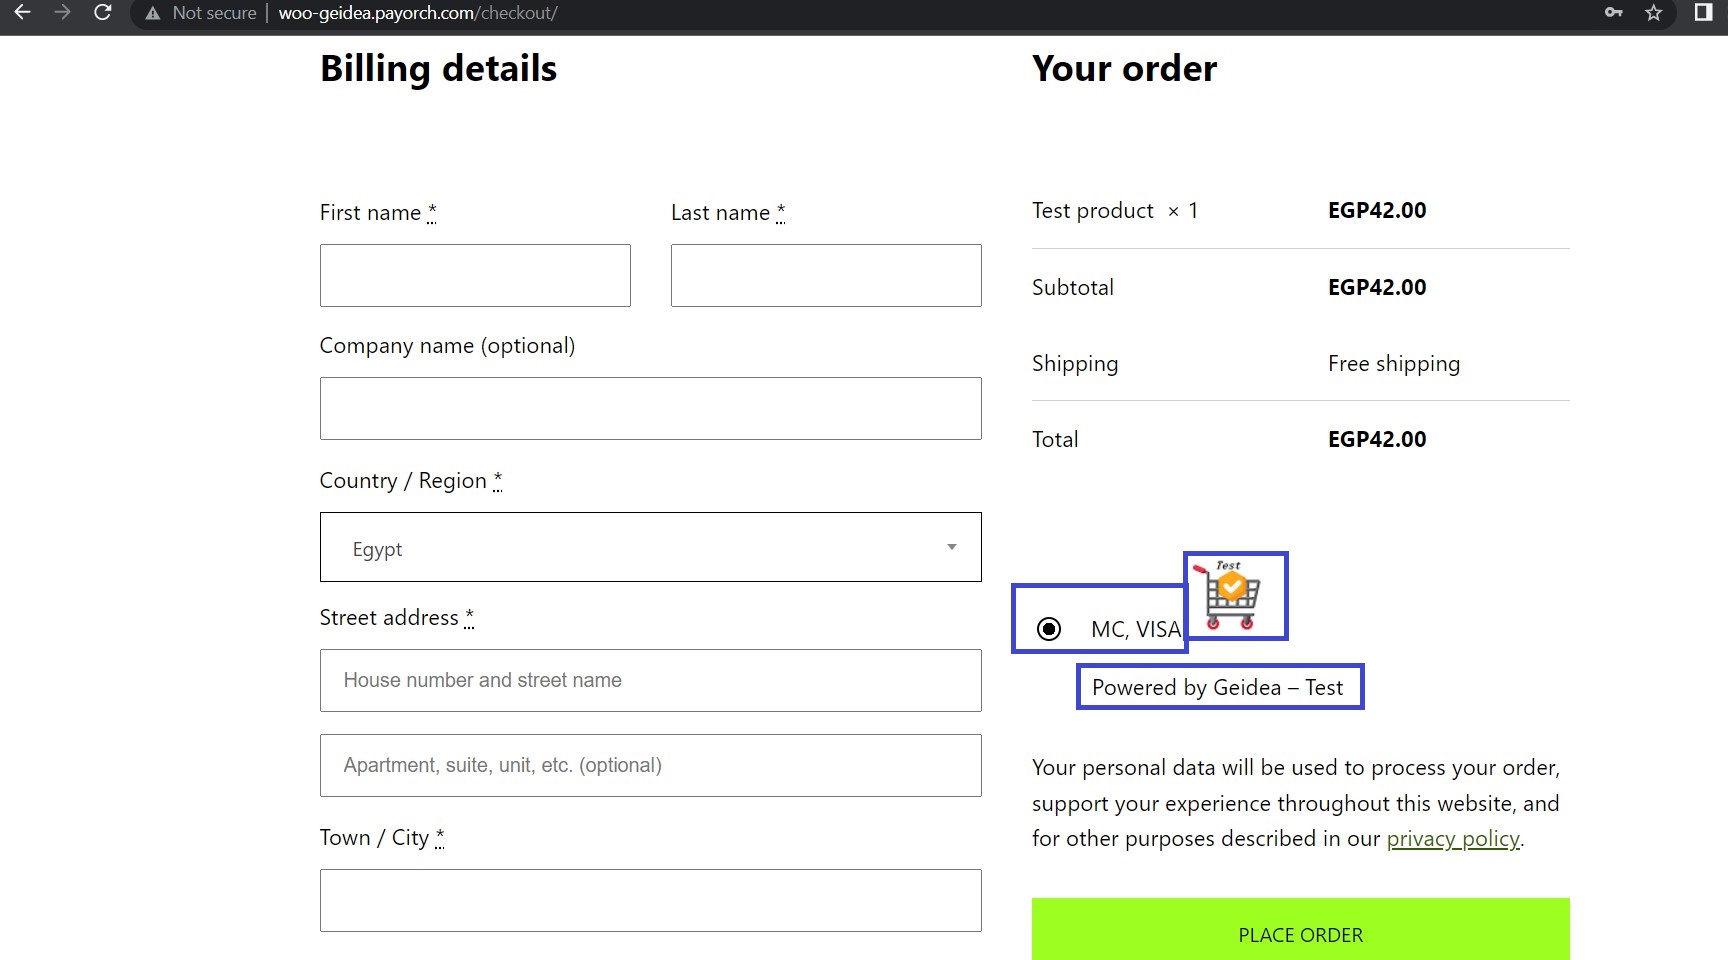
- Once you click on the
PLACE ORDERbutton on your checkout page, Geidea payment methods should be readily available to your customer for completing the payment.
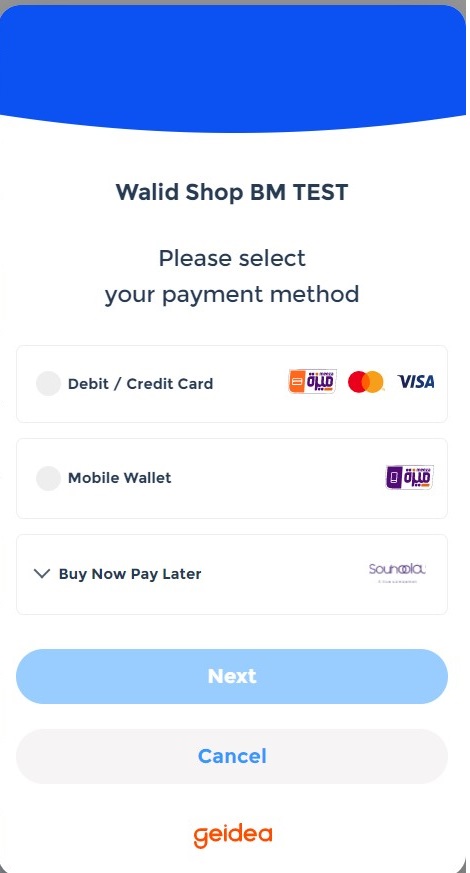
- For testing the payment widget, you may use any of our Test Cards provided here.
Troubleshooting WooCommerce Integration with Geidea Payment Gateway
When you are integrating Geidea with WooCommerce, at times you may encounter some issues. This section describes the recommended steps to troubleshoot some issues you might face during integration with WooCommerce.
-
Geidea does not appear as a Payment Method
Check if theGeidea Online Paymentsplugin is enabled on the Installed Plugins page -
The
Geidea Online PaymentsPlugin is not presenting the Payment widget
Check whether theMerchant gateway keyandMerchant passwordare configured accurately. If they are configured incorrectly, the message -Your credentials are invalid!will be displayed on the Payments tab of the WooCommerce settings page. To access your credentials, please follow the process shared here. -
Always use the latest version of the plugin.
-
In case you are upgrading to the latest version of the plugin, kindly clear your browser cache prior to testing the plugin.
Frequently Asked Questions (FAQ)
Does this support both production mode and sandbox mode for testing?
Yes, it does - production and sandbox mode is controlled by the API keys you use.
Licenses
- License: GPLv3
- License URI: https://www.gnu.org/licenses/gpl-3.0.html
Updated 3 months ago