Pay by Link - Portal [Egypt]
Payment links are a convenient method to generate a unique link. When sent to a customer, it directs them to a page hosted by Geidea, simplifying the process for them to provide payment details and complete transactions with you securely.
The links can be shared with the customer via email, or via SMS.
The link directs your customer to a secure Geidea-hosted payment page, enabling payment via their preferred method (currently supporting cards and select digital wallets). This secure hosted payment page is accessible across all internet-connected devices, ensuring convenience and flexibility for your customers..
Visit the Merchant Portal to log in to your Geidea merchant portal and create one payment link manually.
Advantages of Geidea's Payment Links feature
| Advantage | Description |
|---|---|
| No code experience | The Geidea merchant portal helps you create any number of payment links and manage the links without the need to write any code. |
| Customized branding | You can customize your payment links and emails with your business branding and logos. |
| Compatibility with multiple channels | You can share the payment links the way your customers want; via SMS, e-mail directly through Geidea or via any social media platform by copying our link to it |
Capabilities
| Capability | Description |
|---|---|
| Create a Payment Link | Create a new payment link |
| Send a Payment Link | Share payment link with your customers |
| Receive Payment | Accept payments from your customers |
| Bulk Payment Link | Accept large number of payment requests |
| Static Payment Link | Accept payments from multiple customers using a single link |
Steps for accepting payments via Payment Links
• Create an invoice from the merchant portal
• The system generates a link that you can send to your customer
• The client receives the link and when opened, it takes them to the eInvoice payment page
• The client clicks on the Pay button. The HPP is initialized with the amount and currency. The client needs to enter their card details or choose to pay with the Meeza Digital wallet
• Once the payment is completed successfully, the client is redirected to a Payment Link receipt page to view a confirmation of payment.
Create a Payment Link
1. Log in as a merchant into your Geidea Account
2. You can see your placed orders with Geidea and a dashboard with revenue
3. You can see a menu icon on the left panel stating: 'Pay By Link'

4. Click on the Create icon, which will navigate you to a screen where you can add Payment Link details for your client.

5. You need to enter the following fields for your payment link to be created:
a. Find or Add New Customer mandatory field, must be valid Customer Details.
You can now easily search for your existing Customer to which you have already sent a payment Link or Add a new Customer by clicking on the field and +Add Customer

b. Customer name – mandatory field
c. Customer email – must be a valid email, mandatory field (if no phone number is provided)
d. Customer phone – must be a valid phone number, mandatory if no email address is provided
e. Creation and Expiry date from the date drop-down menu. By default, the activation date is set to the current time and date of creation of the invoice and expires 30 days from its creation.
This can be set to a bespoke activation and expiry date to your preference. The activation date can be set in the future and the expiry date should be set after the activation date.
If you want to return to the default settings – you can choose the radio button ‘Next 30 days’ and you will be back to the initial set-up.

Once you have set a preference for the activation and expiry date – click on the ‘Apply’ button or ‘Cancel’ if you don’t want to save the change

If the invoice date is not accurately set up, you will receive an error message.

f. Payment Link reference – This is a reference number of your choice for your tracking purposes. Optional field
g. Collect customer's Billing/Shipping address check-box – this field specifies if you want the customer to enter their address details on the payment afterward (turned off by default)
h. PreAuthorize amount only check-box– this field specifies if you want to have the sum of the payment only Authorized and for you to Capture it at a later stage depending on your business. (this is an optional feature)
5. Add Items details:
a. Click on the Add new item button to add the good or service you want to be paid for and a pop-up will appear.

Fill in the following information in the pop-up:
- Description of the item – mandatory
- Unit price – the price per unit of the good you are selling - mandatory
- Quantity – mandatory
- SKU – stock keeping unit – if you want to track it in your system. Optional field
- Item discount – can be a percentage or an absolute amount (selected from the dropdown menu) - Oprtional field
- *Item VAT – can also be a percentage or an absolute amount (selected from the dropdown menu) - Optional field
When you are done with adding the item, click on Save changes and your item will be added or you can close the window using the ‘x’ button to cancel.
Once the new item is added, it should be visible in the item details list (e.g.)

The added items can be edited and/or deleted by using the respective buttons:

Once you have added all your items with extra discounts and charges, you can proceed with the PayByLink creation.
You have the option to either ONLY Create Payment Link and send it later OR Create and Send Option which will immediately send the Payment Link through Email Or SMS OR Click on Cancel at the bottom to go back to the dashboard.

If you have Tamara enabled as payment method (KSA Only)If you want Tamara to be there as a payment method when the Standard Payment Link is being paid, the following information is mandatory to be passed during link creation.
Customer Creation:
- First & Last name
- Mobile Number & Email Address
- Billing and Shipping Address
Item Creation:
- Item Name
- Item Price
- SKU
View Payment link dashboard
1. Log in as a merchant into your Geidea Account. Within your account, you'll find an overview of your placed orders with Geidea and a dashboard providing insights into your revenue:

2. On the left panel, you should be able to see the Pay by Link icon. When selecting it, a sub-menu with a list of options will appear.

3. Click on the Dashboard icon, which will navigate you to the payment links overview page. On the Dashboard you can see the following information for every Payment Link:
• Customer name
• Payment Link Id
• Reference
• Status
• Amount
• Currency
• Created date
• Paid date

You can also customize the viewing mode of your invoice list, by selecting the number of rows per page:

4. If you wish to edit the details for a certain payment link, click on the three dots on the right of the respective link and select Edit Payment Link from the dropdown menu. You will be redirected to the edit page for the selected Link:

You can edit your payment link only when it has not been Sent to Customer. Once the Payment Link has been sent, you can ONLY View the Details.
Once the Link is edited you can save the changes when clicking on the Update Payment Link button. If you do not want to save the changes, click on Cancel.
5. Review Payment Link Details by clicking on the three dots on the right of the payment link you want to send and select the View Details option from the dropdown menu. This will redirect you to the details overview page for the selected Link.

Send Payment Link
The Payment link will be sent in below following ways :
a. Send Via Email
b. Send Via SMS
Send Via Email:
To send the Payment Link click on the highlighted Send Payment Link button on the top of the screen. Please note that there is also a dropdown option, which gives you the opportunity to send Links via SMS.
Once the button is triggered a confirmation window will appear.


Click on confirm in order to send the link or click on cancel to abort the process.
Send Via SMS
If you wish to send the payment Link by SMS click on the dropdown and select the Send via SMS option. This would trigger a popup window to confirm the phone number to which the Payment Link should be sent. To send the link click on Confirm or click on Cancel to abort the process.


- Once the Link is sent to the customer a confirmation with a timestamp will appear beneath the Send Link button and the status will change to “Sent to Customer”.

If you hover over the information icon on the payment link status, you can see the action color codes:

The new status of the payment link can also be seen on the Payment Links Dashboard.

Pay payment link
To pay the payment link after it is sent the steps below should be followed:
- After the payment link is sent, the customer should receive a message on the email address provided in the link creation process. This message contains details for the order and a link triggered via a Pay Now Button.

- After clicking on the Pay Now button the customer is redirected to a Geidea Web Page with an Order Overview.

If the customer has received the link by social media or SMS, once he opens the link, he should be redirected to the same page.
- After clicking on the Pay button, a popup window appears with the available payment methods. For more information on the different payment methods, please refer to the respective payment method guide.

- After selecting the preferred payment method, the user should be redirected to the respective hosted payment page, where he can proceed with the payment (e.g. credit card or debit card)

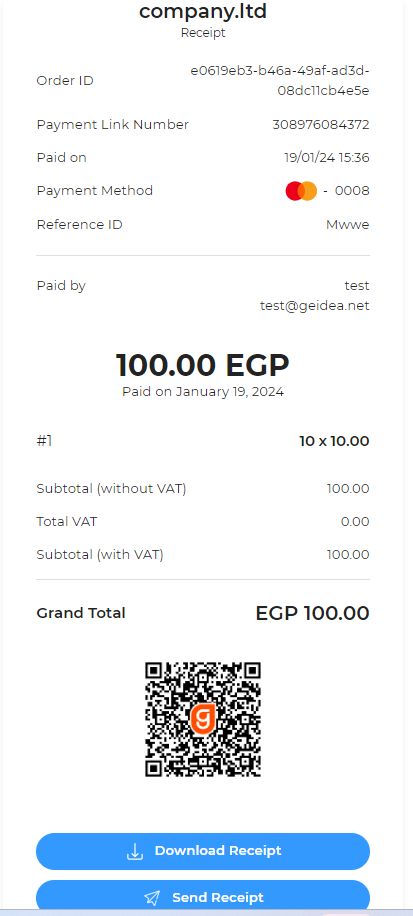
- After the user enters the necessary data and clicks on the Pay button, once the payment is successfully executed, he should be redirected to a web receipt, confirming the successful purchase.
The receipt can also be downloaded by clicking on the Download button at the bottom of the page. It can be also sent to the customer via email by clicking on Send Receipt button.
Bulk Upload Payment Link
In Bulk Upload merchants can now download a CSV file, and add information for multiple customers and payment links would be sent once the Bulk File is Uploaded and Processed. After processing the file, you have the option to Either create only or create and send all payment links from this file to the respective users.
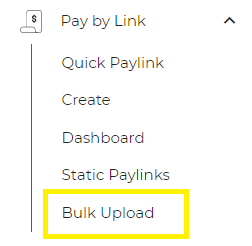
Step 1: Select the Bulk upload section from the Pay by link menu
Step 2: Select which template you want to download to start inputting data in:

The Basic template gives you the minimum required fields need to input to create payment links

The Extended template gives you the option to provide more data per payment link to be generated.

Both files have a sample row and the expected value types in the Title
Step 3: Once you entered the data in the template you selected – you can upload it on the portal and process:

Step 4: Hit Browse and navigate to your file:

You have to select a .csv file only – any other will fail the validation.

The file will be validated and if there are errors with it you will be prompted to try again with a valid file. Samples for Error are displayed above.
Step 5: Once your file is validated it will appear on the screen and you will have the option available to process the file or you can choose to delete and add a new file.
NOTE: only one file can be uploaded/processed at a time

Step 6: Select Process and choose from 2 options
Option 1 – only create the payment links from the file.
Option 2 – create and send all payment links from the file ( sending the payment links will be automatically done on all channels for the specific payment link – e.g. if you have submitted both email and phone number per payment link then the customer will receive an email and an SMS suggesting them to pay the payment link)

Step 7: Once you have selected the desired option the creation of payment links will start from the file and once finished you will receive a message.

Step 8: Click on the Go to Dashboard button to navigate to the dashboard and see all your created payment links.

If you have chosen to create and send, then the payment links will have the status "Sent to Customer" instead of the Created status.
Step 9: You can go to the Bulk upload page again to see your bulk upload history:

Static Payment Link
Introducing Geidea's Static Payment links, a feature allowing multiple customers to access a single link for online payments. Customers can conveniently pay for goods/services via the Geidea Hosted payment page and receive online receipts. This reduces the effort of creating individual links for identical items, simplifying order management. Simply create one link per product and specify the desired number of successful orders. Sit back and relax as all orders are consolidated under a single Static Payment Link Number. Additionally, easily share the link URL on social media platforms or utilize the QR Code for accepting payments.
How to create a Static link?
- Create a Static Pay link via the merchant portal.
- The system generates a link and QR code for your preferred platform.
- Upon clicking the link or scanning the QR code, customers are directed to a secure payment page.
- Customers initiate payment by clicking the Pay button and entering card details or selecting a preferred payment method.
- After successful payment, customers are redirected to a receipt page confirming the transaction.
Step-by-Step Process
To create a Static Pay link, you need to follow the steps below:
1: Log in as a merchant into your Geidea Account. You should be able to see your placed orders with Geidea and a dashboard with the revenue:
Click on the Static Pay links icon, which will navigate you to the Static Pay links Dashboard.

On the Dashboard you can see the following information for every Payment Link:
- Static Pay link Title
- Static Pay link Number
- Reference
- Status
- Amount
- Currency
- Creation date

2: Click on the Create Static Paylink button in the top right corner. This will redirect you to the static pay link creation page:

Add Static Pay link Details for your static pay link to be created:
Static Pay link Title – mandatory field
Static Pay link Reference – optional field. This is a reference number of your choice for your own tracking purposes
Limit of successful orders – optional field. It determines the number of times that the link can be accessed and paid. If the field is left empty, there won't be any restriction on the number of orders made.
Creation and Expiry date from the date drop-down menu. By default, the activation date is set to the current time and date of creation of the link and expires 30 days from its creation. After the expiration date, the link will no longer be accessible.
This can be set to a bespoke activation and expiry date to your preference. The activation date can be set in the future and the expiry date should be set after the activation date.
If you want to return to the default settings – you can choose the radio button 'Next 30 days' and you will be back to the initial setup.
Collect customer's Billing/Shipping address check-box – this field specifies if you want the customer to enter their address details on the payment afterwards (turned off by default)
PreAuthorize amount only check-box – this field specifies if you want to have the sum of the payment only Authorized and for you to Capture it at a later stage depending on your business.
Add Items details for your static pay link – the following fields should be populated in order to create the payment link
Item Description – The description of your product. - Mandatory field
Unit price – The price per unit of the good you are selling. - Mandatory field
SKU – Stock keeping unit – if you want to track it in your system. - Optional field
Item VAT – Can be a percentage or an absolute amount. (selected from the dropdown menu) - Optional field

Once the Payment Link for your product is created you will receive all your Orders under a single Static Payment Link Number. You can also post the Static Pay link URL on your social media platforms as well as share the QR Code to accept Payments.
Edit Static Payment Link
If you wish to edit the details for a certain static pay link, click on the three dots on the right of the respective link and select Edit Payment Link from the dropdown menu. You will be redirected to the edit page for the selected Link:

From here you can Disable/Enable the Static pay link using the toggle on the top right of the page. If the link is disabled, it will not be accessible for customers until enabled again.
Once the Link is edited you can Save the Changes when clicking on the Save Changes button.
If you do not want to save the changes, click on Cancel.

Review Static Payment Link
Review Static Link Details by clicking on the three dots on the right of the payment link you want to send and select the View Details option from the dropdown menu. This will redirect you to the details overview page for the selected Link.

To share the static pay link you can copy the payment link using the icon at the right of the address and send it to the customer yourself to any social media (e.g. Facebook messenger; WhatsApp etc.) or a different medium of your choosing:

Updated 4 months ago