PrestaShop
This document presents the steps for integrating the Geidea payment gateway with your PrestaShop store.
Overview
PrestaShop is a freemium, open-source e-commerce platform. It is designed for small to large online merchants to set up their e-commerce sites seamlessly. Geidea Payments Online is a gateway module that allows you to accept payments through Geidea. You can easily accept credit cards and other payments through mobile wallet providers or Buy-Now-Pay-Later (BNPL) providers.
Integrating our payment gateway with PrestaShop's online stores has never been easier. Through the PrestaShop module, our payment gateway can be seamlessly integrated with just a few lines of code.
Pre-requisites
You will need a merchant account with Geidea and the following software running in your hosting environment to accept payments using the Geidea payment gateway.
| Software | Version |
|---|---|
| PrestaShop | 8.0.2 or greater |
| Geidea Online Payments module | 3.2.0 |
| PHP | 7.4 or greater |
While we make every effort to test software or module or plugin updates rigorously, there is no guarantee that a plugin or module would work seamlessly with your hosting environment. So please back up your website before updating any plugins or modules. This helps you restore your website from backup in case you run into unexpected errors.
Software and plugin or module updates involve programming code changes. The updates may often request upgrades to the server or other hosting software such as PHP as well.
Integration Steps
After you successfully set up your PrestaShop store, follow the following steps
Step 1: Obtaining the module
Clone the plugin from the GitHub folder (link). Zip the folder and rename it as geideapay.zip
Step 2: Installing the module (Fresh install)
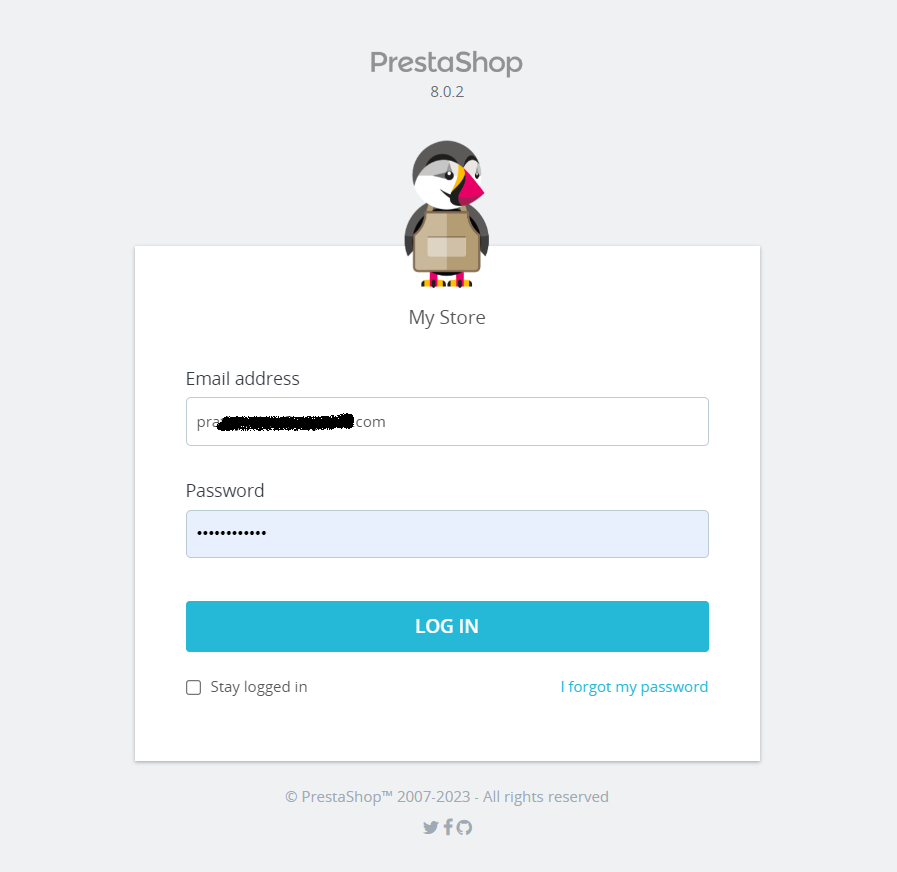
- Log in to your PrestaShop admin account.
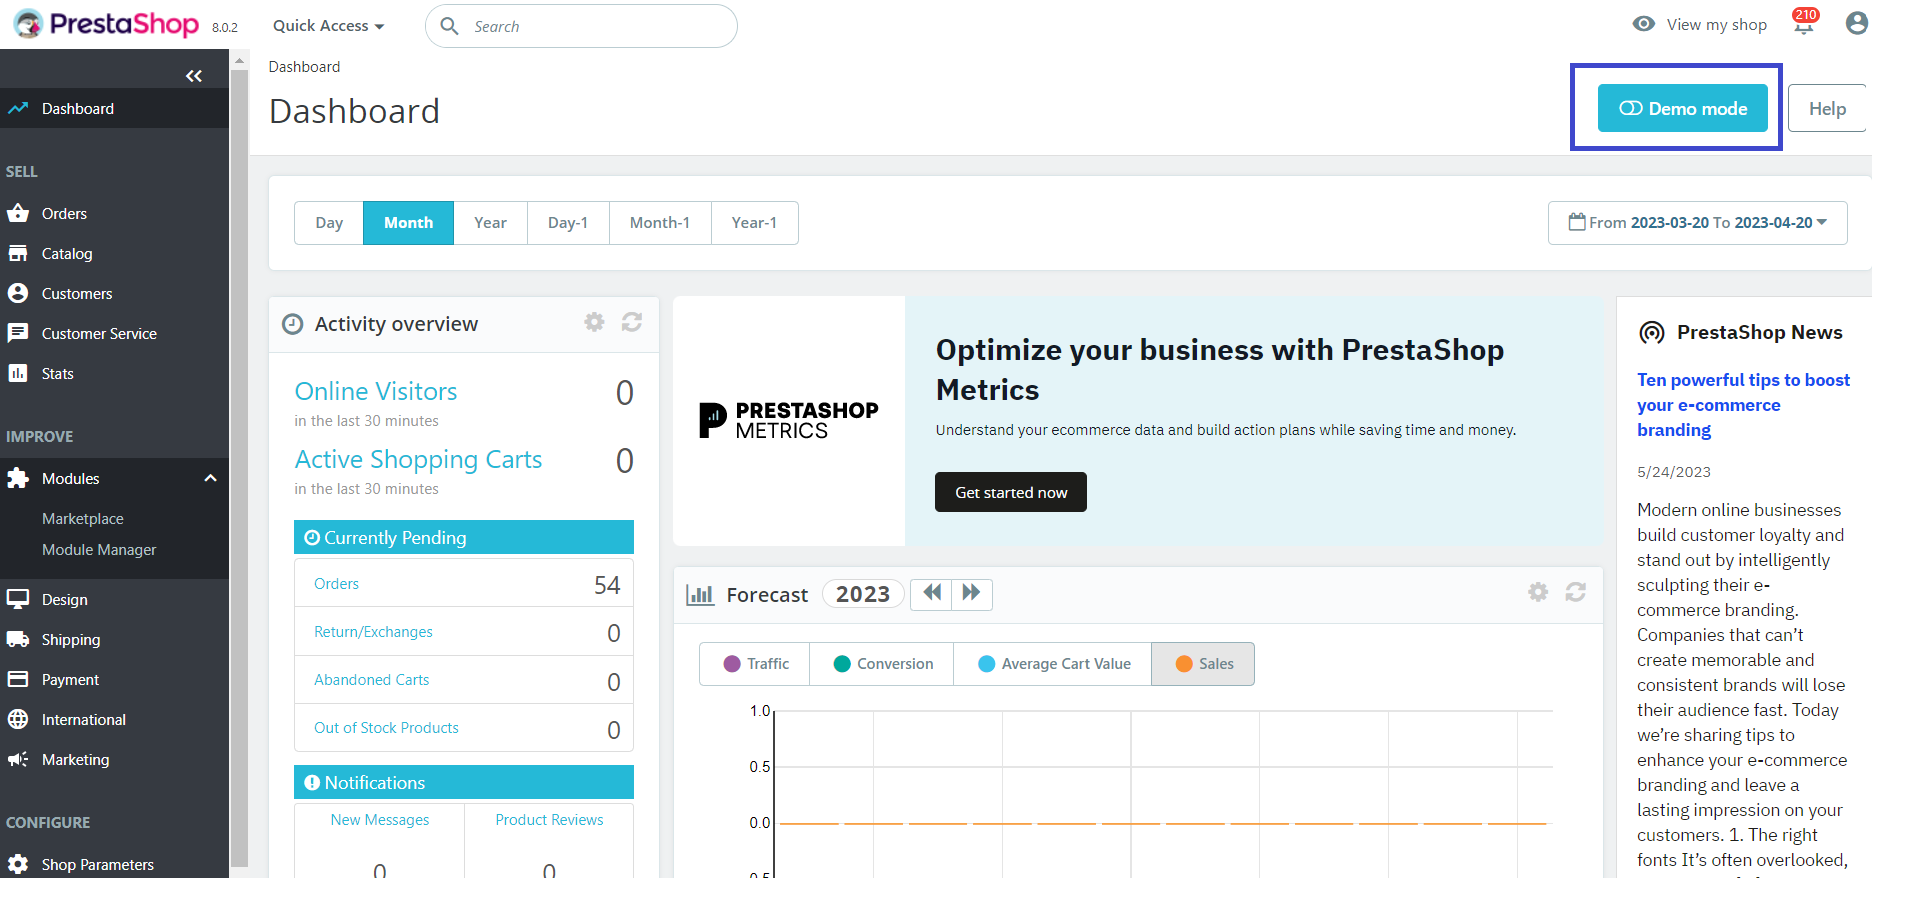
- To test the module before enabling it for your customers, you can use the Demo mode in the PrestaShop framework. You can activate the Demo mode by toggling the
Demo modebutton in the admin dashboard
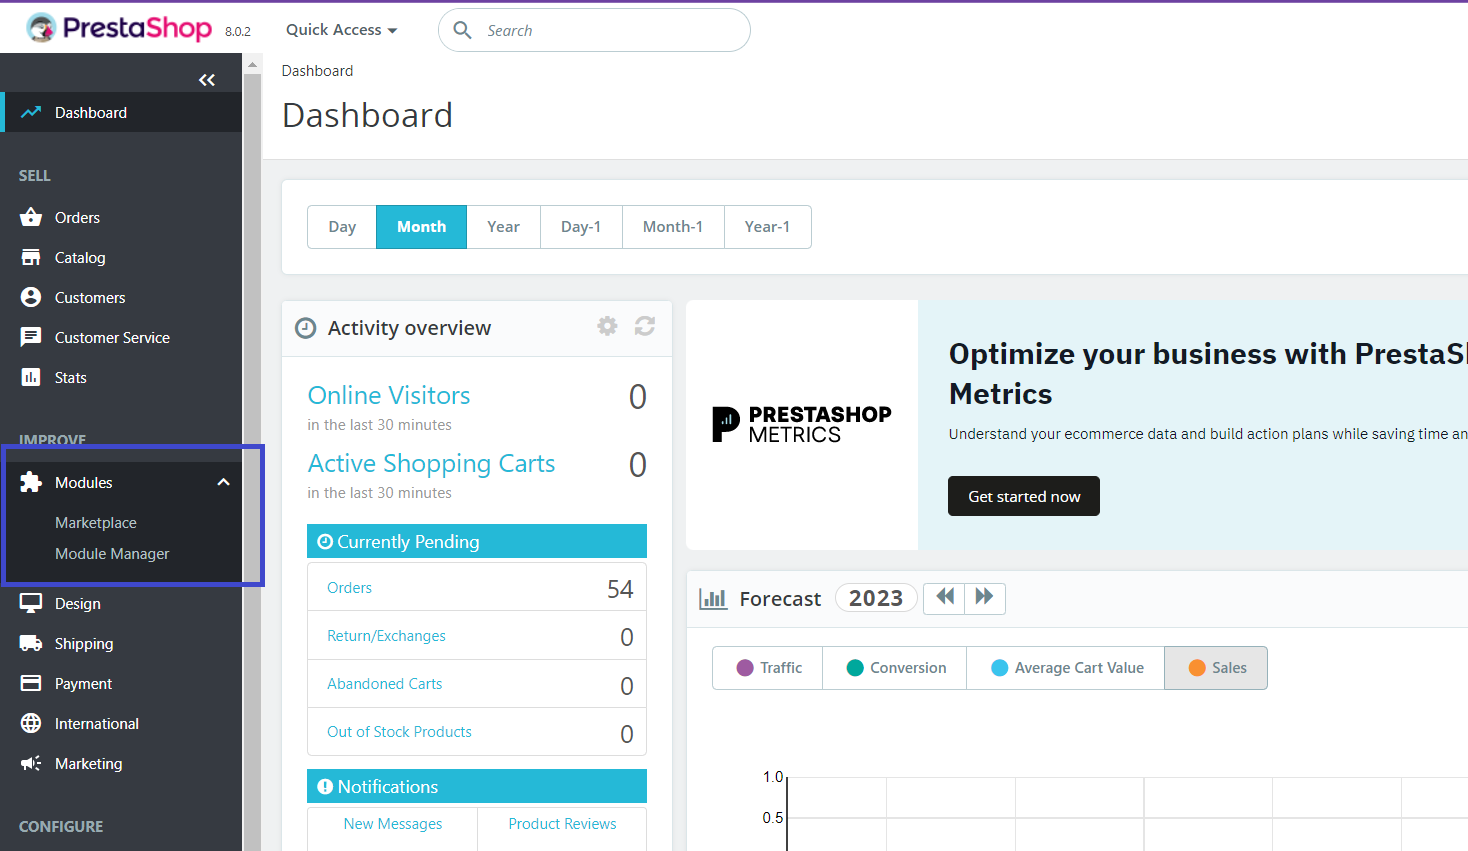
- Click on Modules > Module Manager
- Click on Upload a module and navigate to the downloaded module.
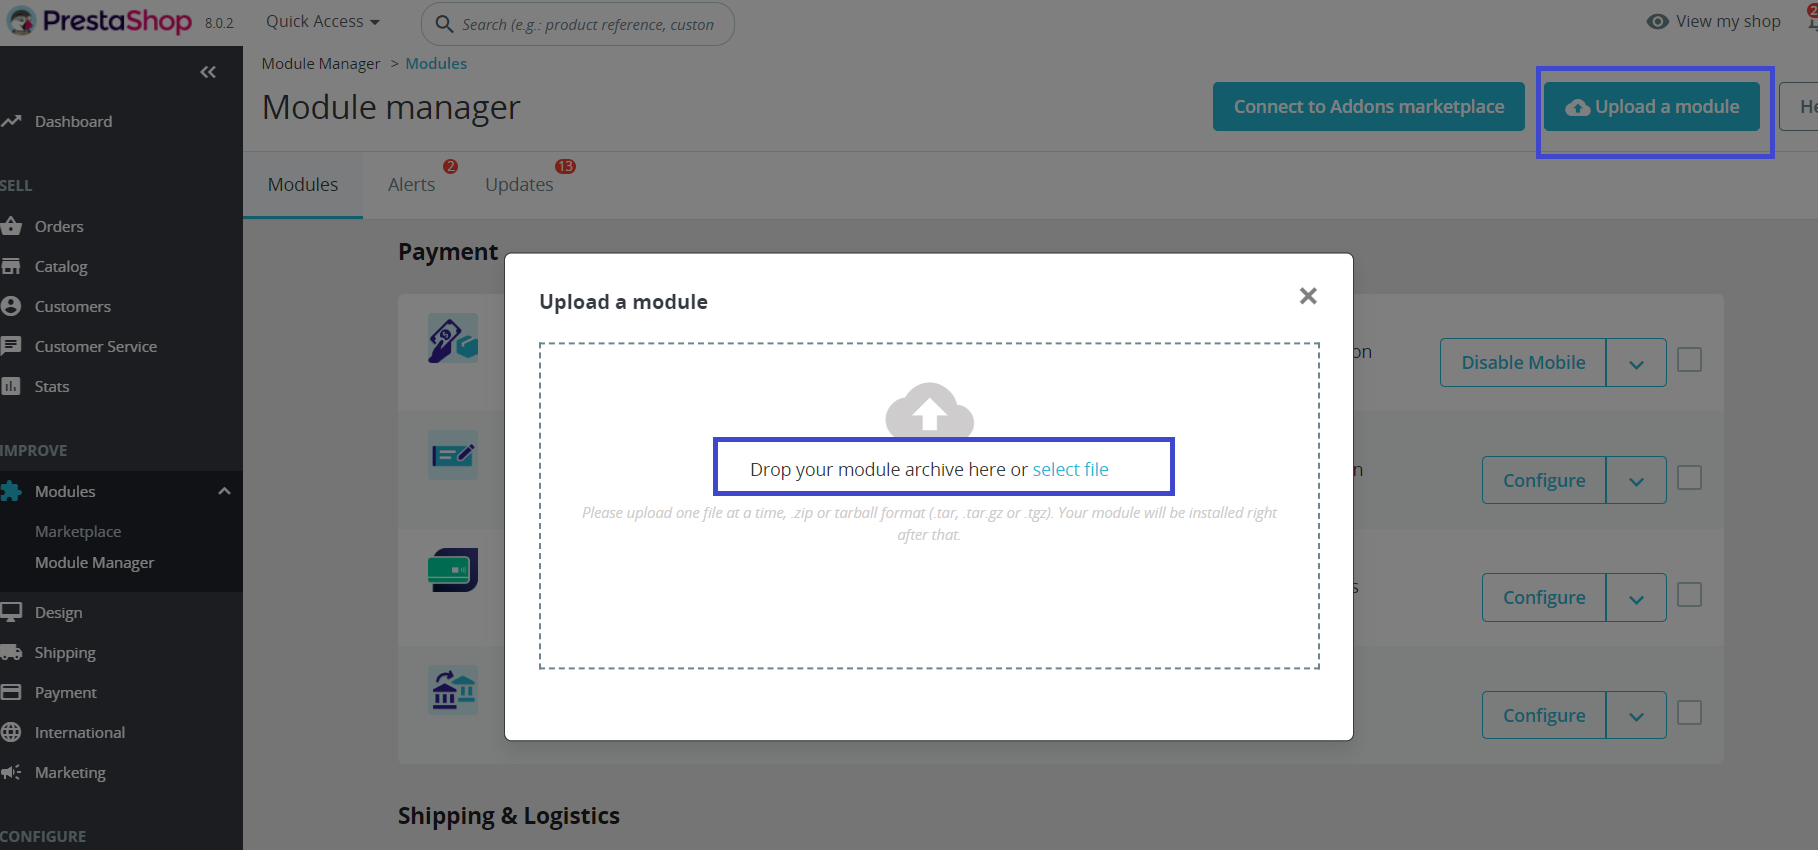
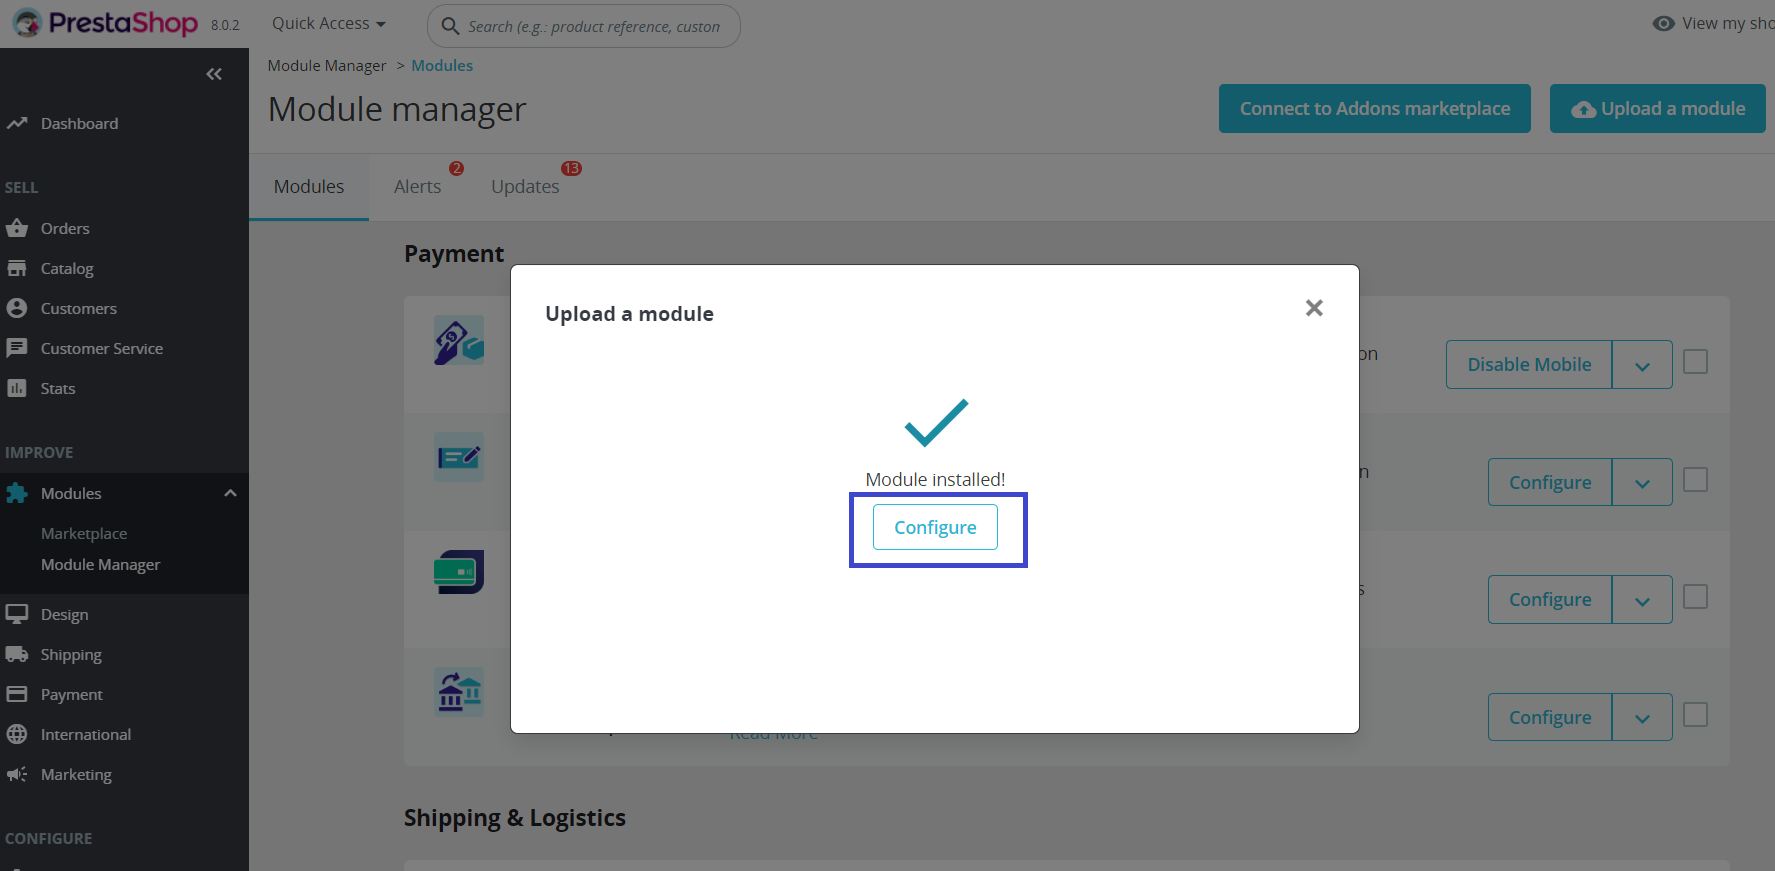
- Once you upload or drag the file, the module automatically installs and will be available for configuration. Click on the Configure button after installation.
Step 2.1: Installing the module (Upgrading)
If you are upgrading your Geidea Online Payments module, please follow the following steps.
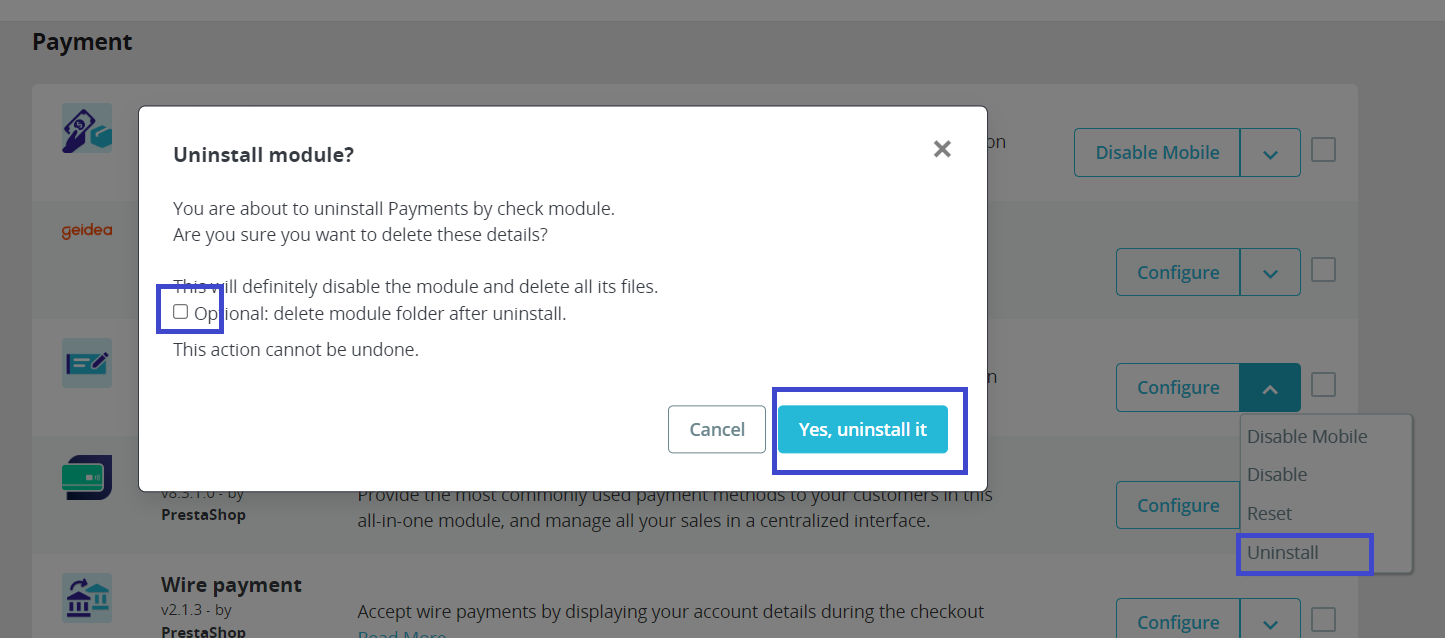
While many software support directly installing the latest version over the prevuious installation, it is prudent to uninstall the previous version and then install the latest version. When uninstalling, please select maximum options to remove traces of the previous installations.
You can uninstall a previous installation of your Geidea Online Payments module using the following steps
- Expand the dropdown arrow next to the module and click on the uninstall option. A pop-up appears as shown below. Check the "Optional: delete module folder after uninstall." and click on the "Yes, uninstall it" button.
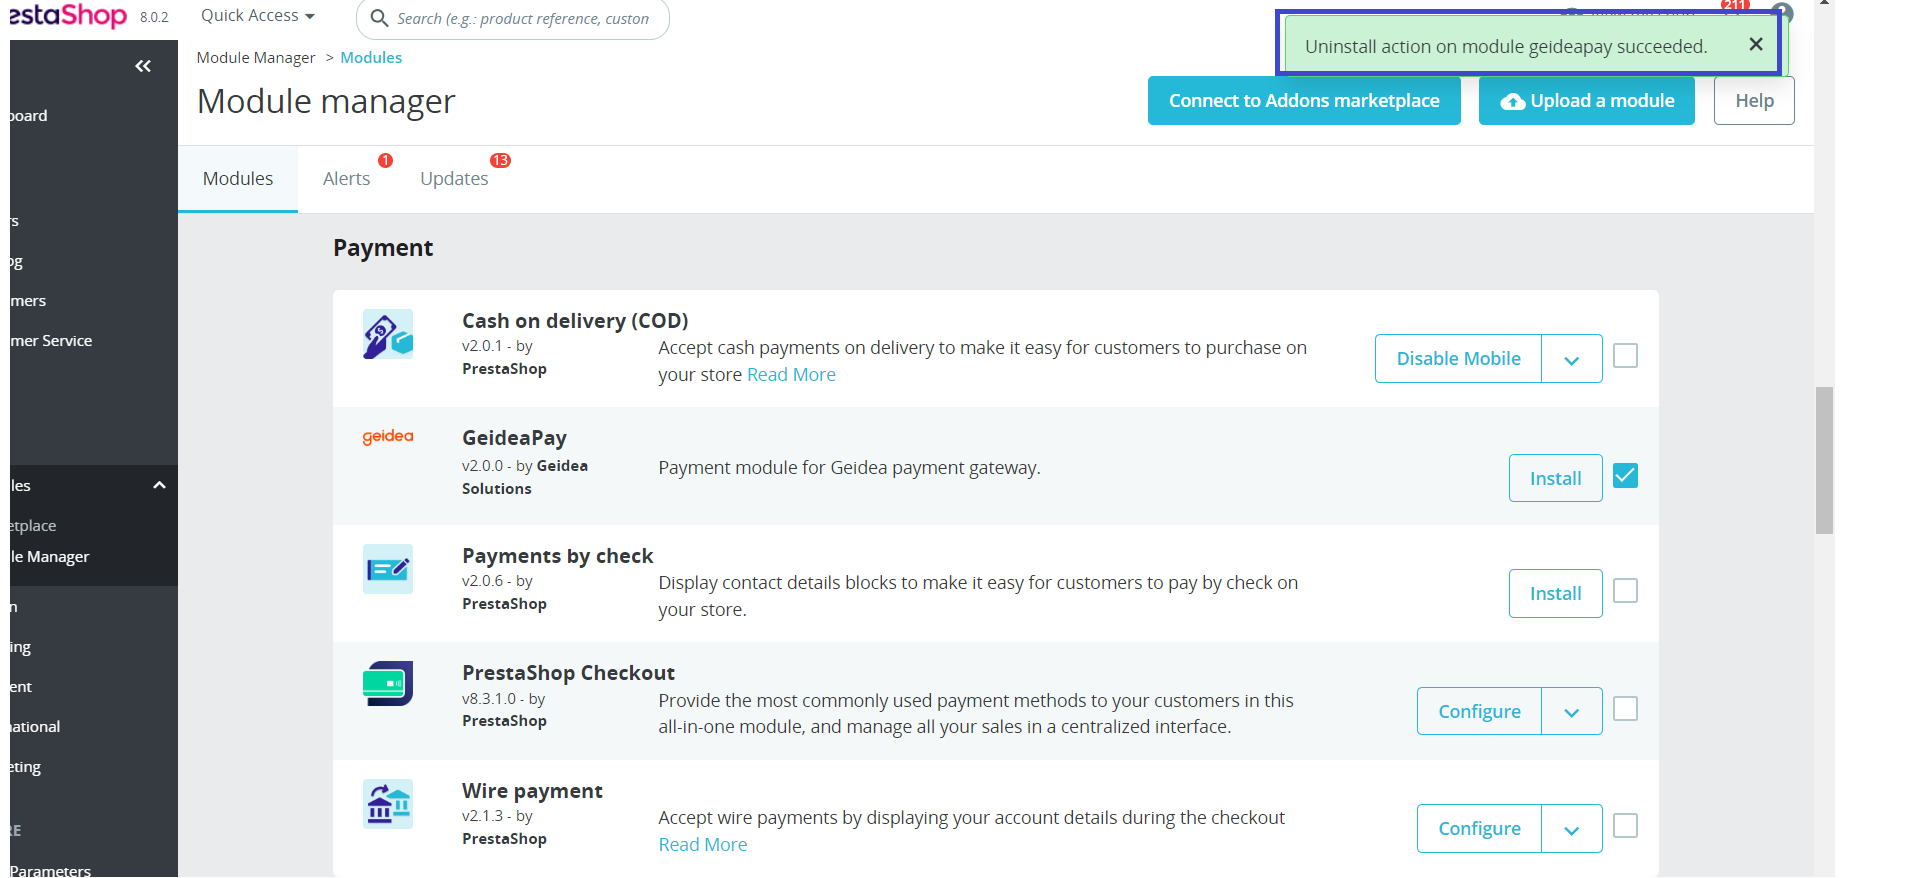
- If the Geidea module is still visible in the Payment section, then refresh the page.
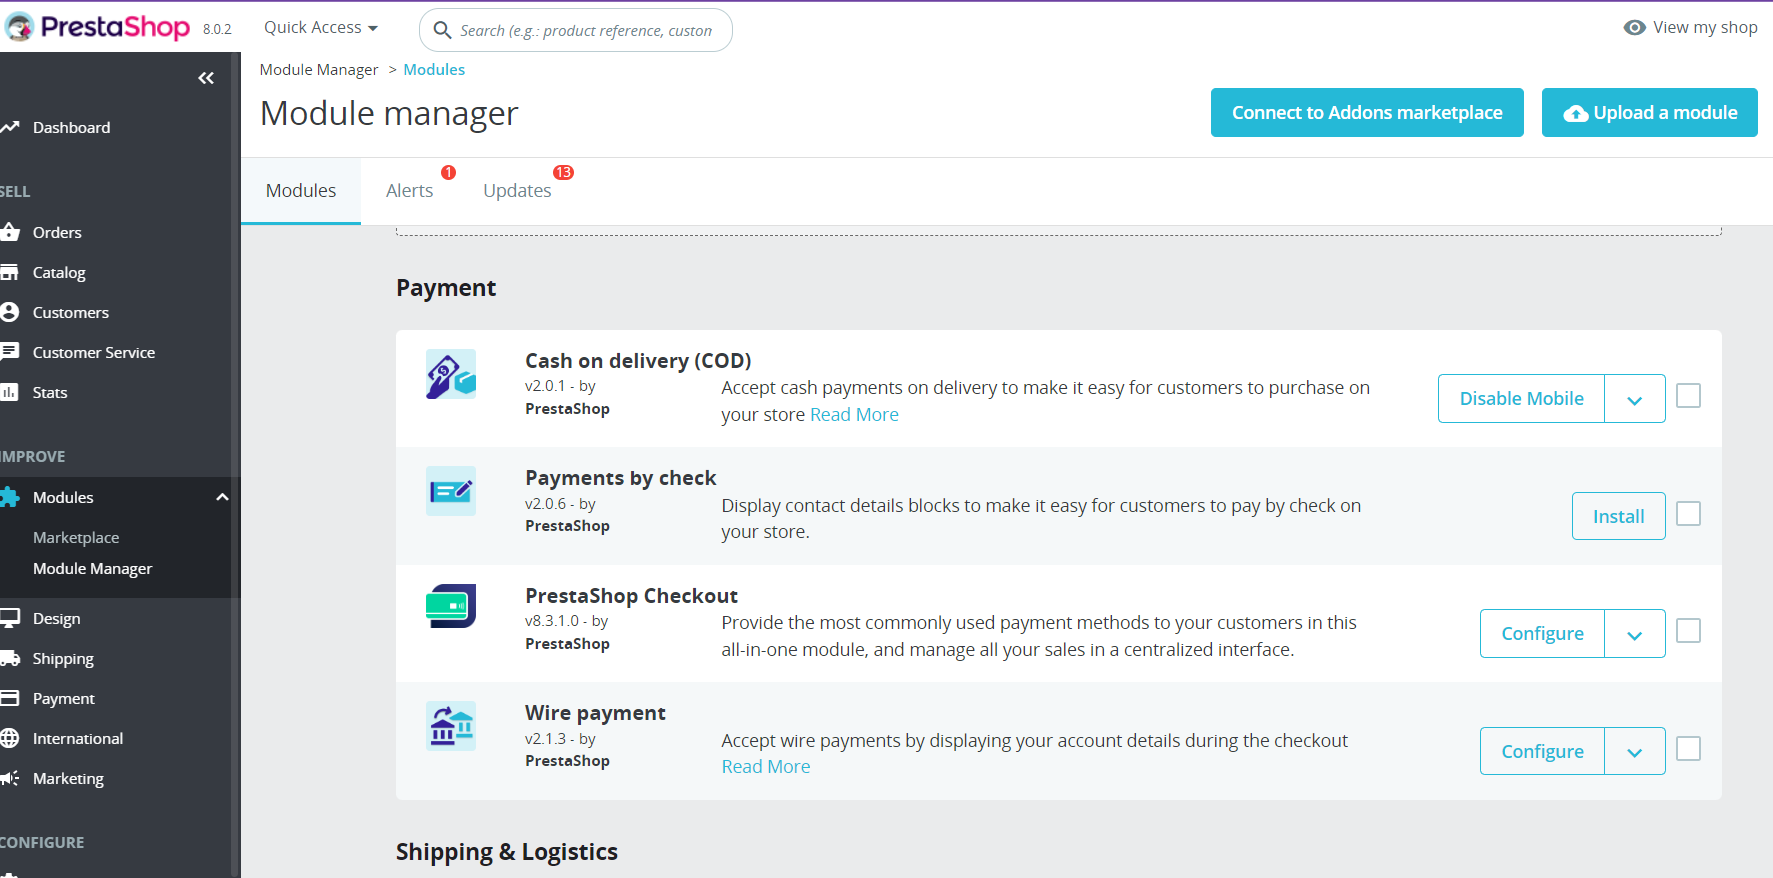
Now please follow the steps required for installing a fresh module in Step 1.
Step 3: Configuring the module
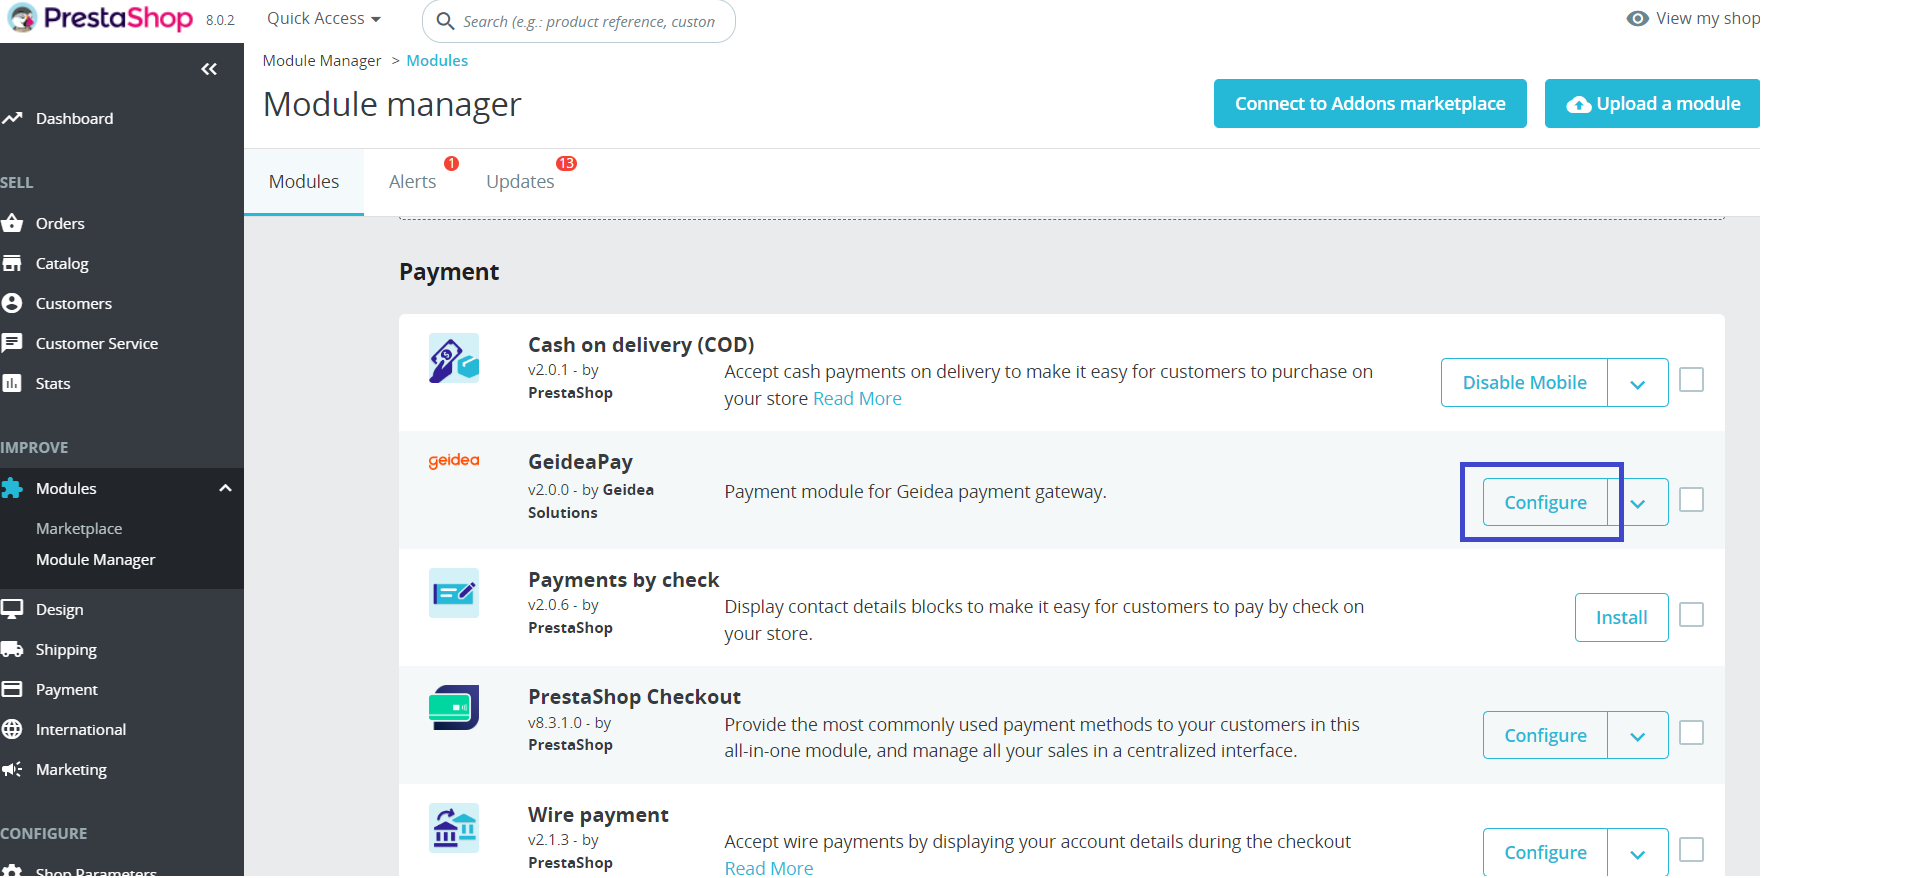
- Click on the Configure button after installing the module.
Alternatively, you could navigate to the module through the Module Manager by navigating as follows:
Modules > Module Manager > Search the GeideaPay module in the Payment category and click on the Configure button on the right side.
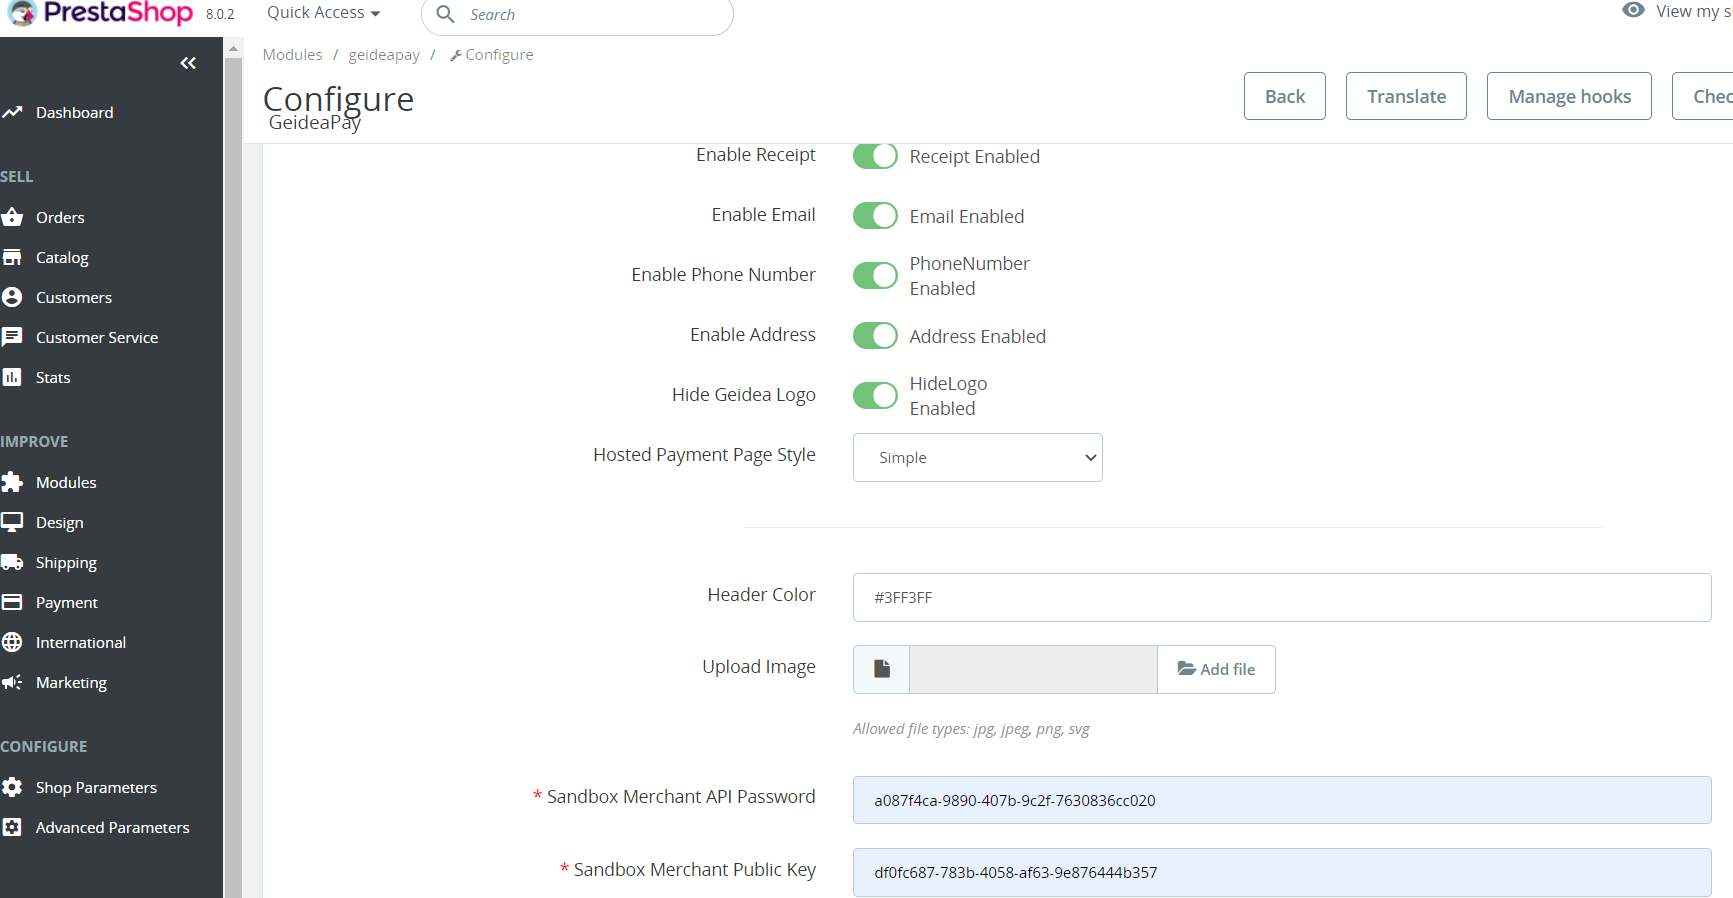
- Fill in the form to configure the module
| Setting option | Mandatory/Optional | Description | Comments |
|---|---|---|---|
| Active | Mandatory | Checking this option enables you to Enable or Disable the Geidea Online Payments module. This is the same as enabling or disabling the payment method by using the Enable option on the Module Manager page. If you want to accept payments using Geidea, you must enable this option. | Toggle switch |
| Title | Mandatory | Text to display to your customers during checkout | |
| Mode | Mandatory | Controls whether you are using a test (sandbox) or live environment | Default is sandbox |
| Environment | Mandatory | Select the environment in which you would like to execute the transactions 1. EGY-PROD 2. KSA-PROD | Dropdown |
| Enable Receipt | Optional | Used to select whether a summary of the payment transaction must be displayed after the transaction is complete | Toggle switch |
| Enable Email | Optional | Displays the option to edit the email of the customer in the payment widget | Toggle switch |
| Enable Phone Number | Optional | Displays the option to edit the phone number of the customer in the payment widget | Toggle switch |
| Enable Address | Optional | Displays the option to edit the shipping and billing addresses of the customer in the payment widget | Toggle switch |
| Hide Geidea Logo | Optional | Hides Geidea logo in the widget | Toggle switch |
| Hosted payment page style | Optional | Used to set the experience for the payment widget. It has 2 values - Simple, Compressed | Drop-down |
| Header Color | Optional | Hexadecimal code of the colour that is displayed at the top of the payment widget | # 333FFF |
| Upload Image | Optional | The logo of the merchant is presented on the payment widget | |
| Sandbox Merchant API Password | Mandatory | Your Merchant account password (API Password) that you should have received after creating an account with Geidea. Please refer to this link for details. | Sample: 9z87y65x-cb3b-11ed-afa1-0242ac120002 |
| Sandbox Merchant Public Key | Mandatory | Your Merchant Account ID (Merchant Public Key) that you should have received after creating an account with Geidea. Please refer to this link for details. | Sample: 1a2b3456-cb3b-11ed-afa1-0242ac120002 |
| Production Merchant API Password | Mandatory | Your Merchant account password (API Password) that you should have received after creating an account with Geidea. Please refer to this link for details. | Sample: 9z87y65x-cb3b-11ed-afa1-0242ac120002 |
| Production Merchant Public Key | Mandatory | Your Merchant Account ID (Merchant Public Key) that you should have received after creating an account with Geidea. Please refer to this link for details. | Sample: 1a2b3456-cb3b-11ed-afa1-0242ac120002 |
- Click on Save.
After following these steps, Geidea Online Payments should be configured successfully, and you should be able to test the gateway by completing a checkout process.

PrestaShop checkout page

Geidea Hosted Payment Page
Updated about 1 year ago